Graphics Programs Reference
In-Depth Information
Step Three:
Once you've created your title slide the
way you want it, go ahead and flatten
the file (click on the down-facing arrow
in the top right of the Layers panel, and
choose
Flatten Image
), and then it's
decision time. You can either: (a) save the
file, and then, in the Timeline panel, click
on the filmstrip icon and choose
Add
Media
to add this slide to your timeline,
or (b) drag-and-drop it right onto your
timeline. To drag-and-drop it, you'll
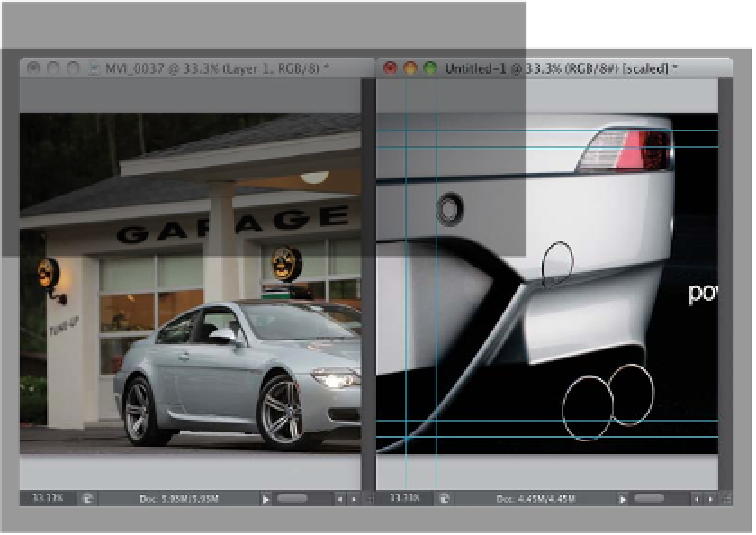
need to be able to see both your slide
document and your video document,
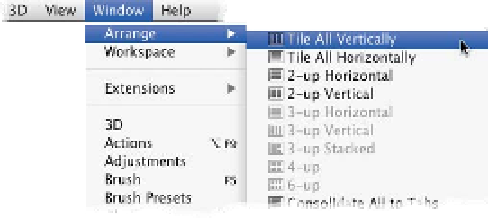
so go under the Window menu, under
Arrange, and choose
Tile All Vertically
to put both windows side-by-side (as
seen here).
Step Four:
Then, get the Move tool again, press-and-
hold the Shift key (so everything lines up
perfectly), click on your flattened title
slide (it's the window on the right in the
previous step), and drag that image over
onto your video clip (you should see a
faint outline of your document as you
drag. If you don't see it, hold the cursor
down a little longer on the slide before
you drag). Because you held the Shift
key, the title slide fits perfectly onscreen
(otherwise, you'd have to reposition it to
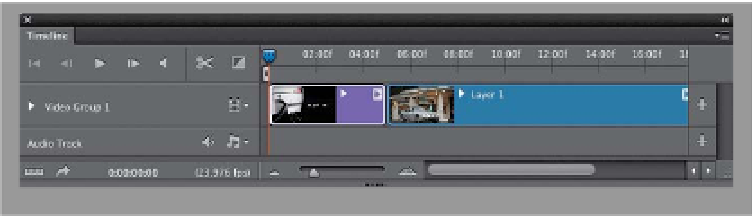
fit onscreen afterward). This adds your
title slide to your timeline, after the video
clip (as seen here at top). To make it ap-
pear as the opening slide instead, just go
to the Layers panel, click on that layer (the
top layer), and drag it below your video
clip layer (as seen at bottom here). Now,
your title slide is the first thing in your
timeline and will appear first when you
play your movie.
(Continued)