Graphics Programs Reference
In-Depth Information
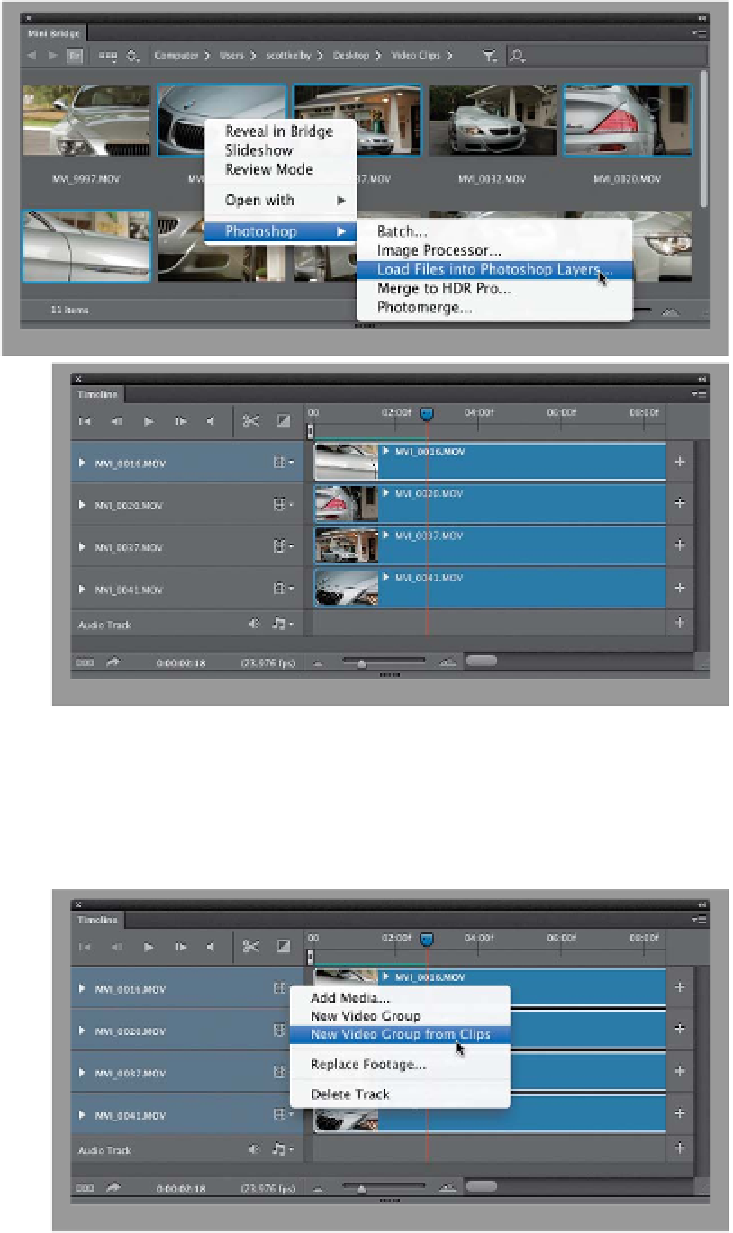
Step Three:
If you want to load multiple clips at once,
just Command-click (PC: Ctrl-click) on
each one to select them in Mini Bridge,
then Right-click on any one of them and,
from the pop-up menu that appears, go
under Photoshop, and choose
Load Files
into Photoshop Layers
. That opens the
files in Photoshop with each on its own
layer. But if you look in the Timeline
panel, you'll see that they're not appear-
ing one after another (meaning one clip
plays, then the next clips plays, and so on).
Instead, they're stacked one on top of
another (all the clips play at once, which is
bad, since all you'll see is the top clip—
it covers the rest).
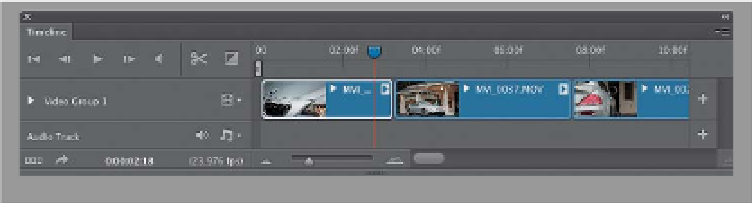
Step Four:
Luckily, we can have Photoshop move
them into a Video Group, which puts
them one after another for us. Just se-
lect all the clips in the Timeline panel
(click on one, then Command-click [PC:
Ctrl-click] on the rest). Then, click on
the little filmstrip icon next to any track
and, from the pop-up menu, choose
New Video Group from Clips
. That's
it—Photoshop rearranges them so
they're now one after another in the
timeline, and the clips will play one after
the other now, as well. If you look in
the Layers panel, you'll see them inside
what looks like a layer group. What's
cool is that you can actually change the
order your clips play in by changing the
order of your layers in the Layers panel.
The layer on the bottom plays first, then
the layer above that plays right after it,
and so on.