Graphics Programs Reference
In-Depth Information
Step Five:
Another new resizing feature added in
Photoshop CS6 is the ability to just click-
and-drag on your photo to reposition and/
or resize it (I know what you're thinking:
“Couldn't we always do that?” Believe it
or not, no). To use this new feature, first
make sure the Scale to Fit Media check-
box is turned off, and then click-and-drag
the image around so you can reach a cor-
ner handle surrounding your image. Then,
just click-and-drag a corner handle inward,
and it resizes your image (kind of like Free
Trans for m does, but you don't have to
hold the Shift key to keep the resizing
proportional—it does that automatically).
Here, I scaled the image down in size
and positioned it where I wanted by just
clicking-and-dragging it in the preview
area. Now, before we go on to the next
step, you're probably wondering what
that lined area around the outside edge
of your paper is all about. That's showing
you where the margins are (the non-print-
able areas of your paper).
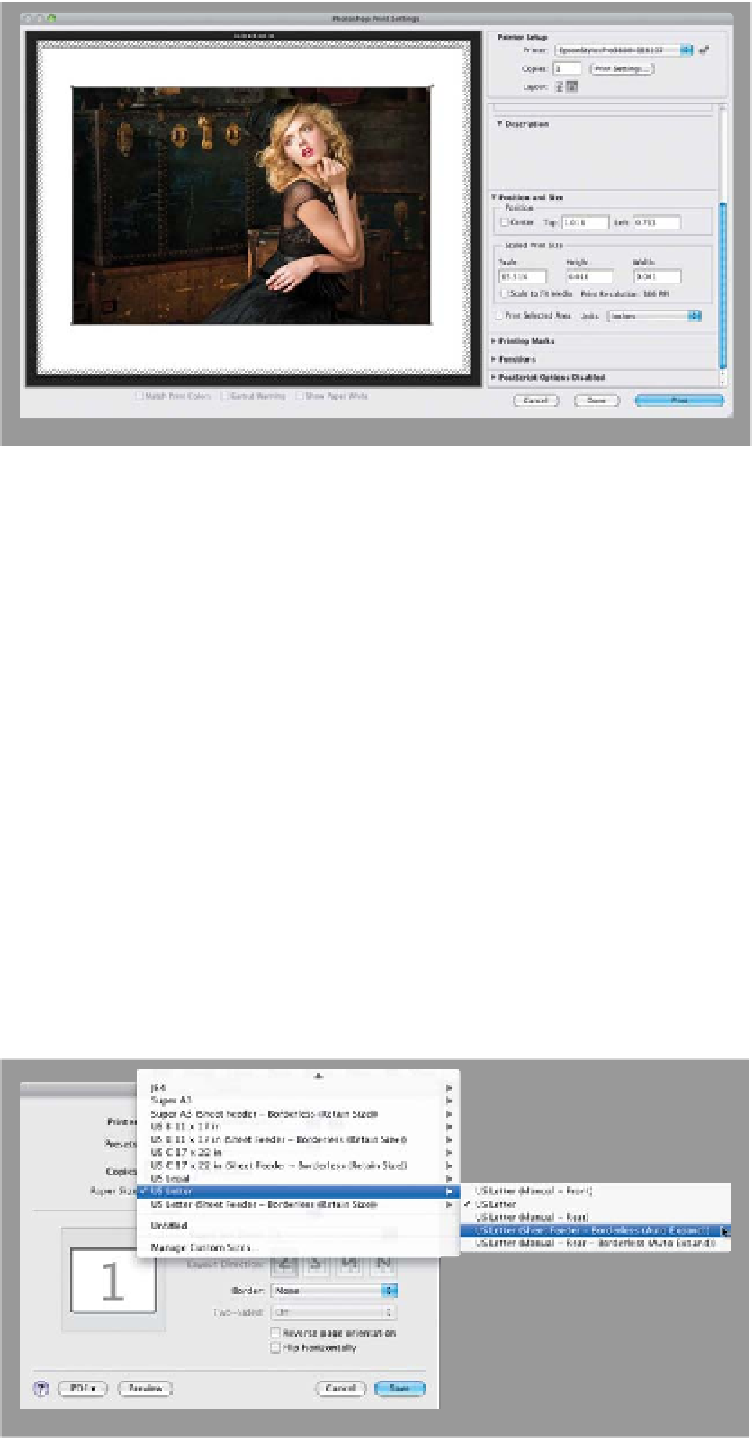
Step Six:
If you want to be able to print all the way
to the border (and have those margin
lines and non-printable areas go away),
all you have to do is to set your margins
to 0 inches. You do this by clicking on
the Print Settings button in the top right
of the dialog (it's shown circled here in
red) to bring up your OS Print (PC: Printer
Properties) dialog (shown here at the bot-
tom). (
Note:
I use Epson printers, but if
you have a Canon or HP, the dialog will
have the same basic function, just in a dif-
ferent layout.) When you choose a paper
size that is borderless (as shown here), you
can now print to the edges of the paper
(well, as long as your printer supports
edge-to-edge printing, of course). Now,
take a look at the preview—the margin
area lines are gone.