Graphics Programs Reference
In-Depth Information
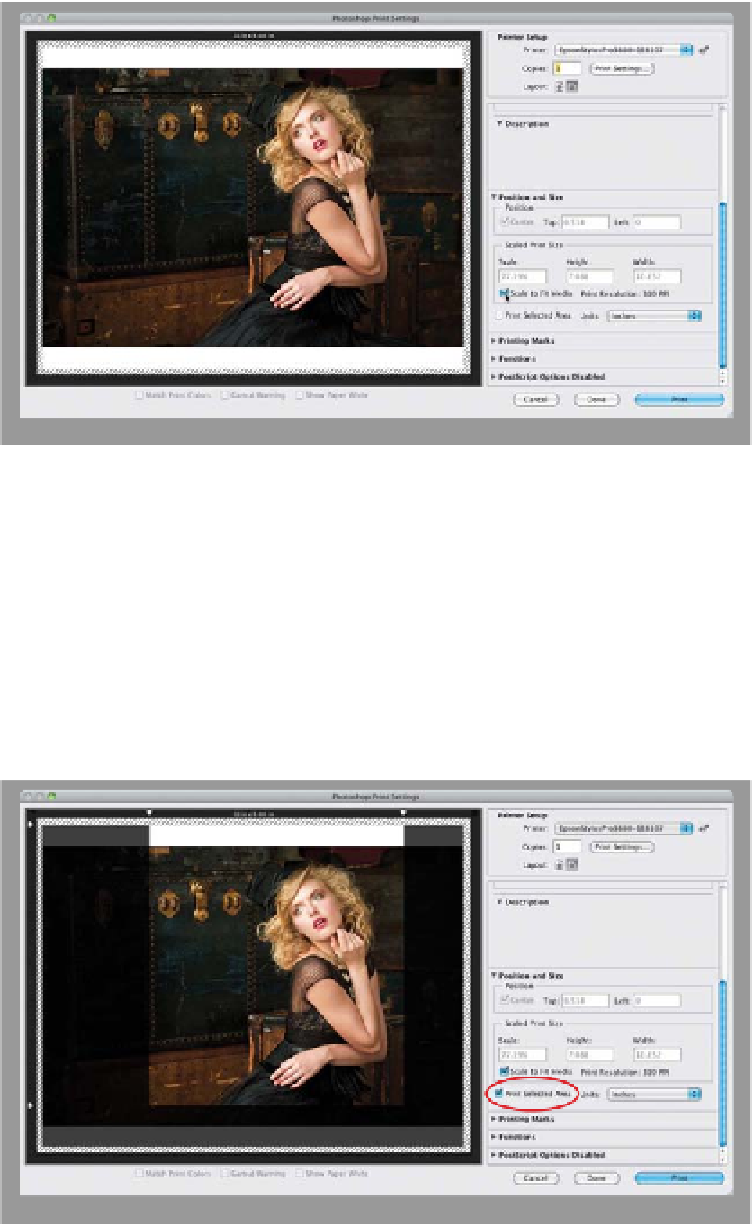
Step Three:
If you want your image to fit fully on the
page, scroll down to the Position and Size
section and turn on the Scale to Fit Media
checkbox (as shown here) and it scales the
image down in size, so the entire image
fits on the page without being cropped
(now you can see the rest of her hat, and
the image is much wider than what we
saw back in Step Two). Just so you know:
I have no problem turning this Scale to Fit
Media checkbox on if my image is going
to shrink in size to fit the paper, but if turn-
ing that on would wind up increasing the
size, I'll hit the Cancel button and go to
the Image Size dialog (under the Image
menu) and resize it there, so I have control
over the upsizing process (see page 139).
Step Four:
While we're talking about size; there's
another new Print feature added in
Photoshop CS6 called Print Selected
Area, and it gives you the ability to just
print part of your image (so, it's kind of
like cropping the print without actually
cropping the image itself). You do this
in the Position and Size section of the
dialog by turning on the Print Selected
Area checkbox. When you turn this on,
you'll see little arrows appear around
the corners of your image. Just click-
and-drag these in toward your image,
and as you do, it darkens the areas to
be cropped away (as seen here, where
I've dragged those arrows on the top
left, top right, and lower left). Now, only
the area that's not darkened will actually
wind up being printed on the page.
(Continued)