Graphics Programs Reference
In-Depth Information
Although it hasn't caught on like many of us hoped, the Smart Sharpen filter
offers some of the most advanced sharpening available in Photoshop CS6
(along with the improved Sharpen tool), because within it is a special sharpening
algorithm that's better than the one found in the ever popular Unsharp Mask filter—
you just have to know where to turn it on. Because Unsharp Mask is still so popular
(old habits are hard to break), I find that I generally switch to Smart Sharpen when
I run into a photo that's just a little soft (maybe I moved a bit when taking
the shot, so it's not really sharp right out of the camera).
Smart Sharpen
Filter Instead
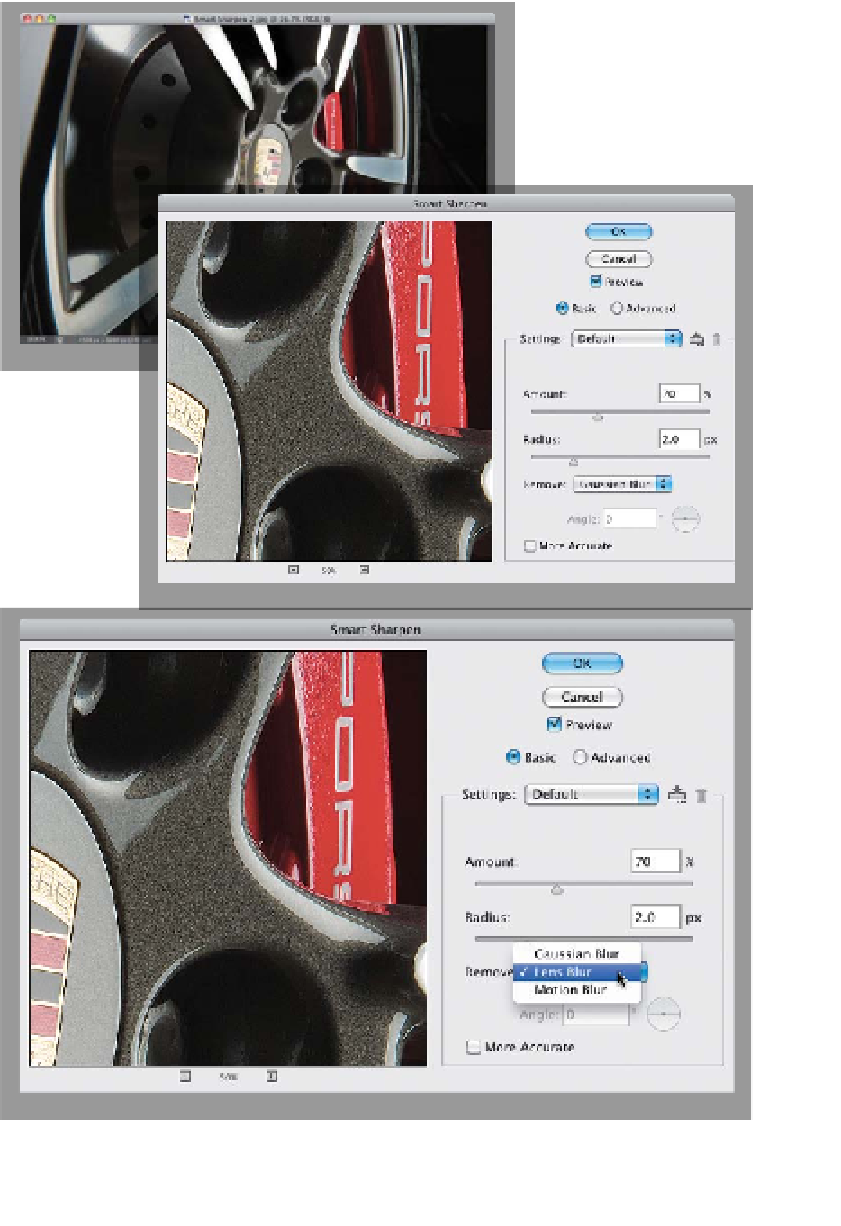
Step One:
Go under the Filter menu, under Sharpen,
and choose
Smart Sharpen
. This filter
is in Basic mode by default, so there are
only two sliders: Amount controls the
amount of sharpening (I know, “duh!”)
and Radius determines how many pixels
the sharpening will affect. The default
Amount setting of 100% seems too high
to me for everyday use, so I usually find
myself lowering it to between 60% and
70%. The Radius is set at 1 by default,
and I rarely change that, but for this
image, I raised it to 2.
Step Two:
Below the Radius slider is the Remove
pop-up menu (shown here), which lists
the three types of blurs you can reduce.
Gaussian Blur (the default) applies the
same sharpening you get using the regu-
lar Unsharp Mask filter. Motion Blur is
useless, unless you can accurately de-
termine the angle of blur in your image
(which I've yet to be able to do even once).
The third one is the one I recommend:
Lens Blur. This uses a sharpening algo-
rithm created by Adobe's engineers that's
better at detecting edges, so it creates
fewer color halos than you'd get with the
other choices, and overall I think it gives
you better sharpening for most images.