Graphics Programs Reference
In-Depth Information
The Most
Back in Photoshop CS5, Adobe rewrote the underlying logic of the Sharpen tool—
taking it from its previous role as a “noise generator/pixel destroyer” to what
Adobe Product Manager Bryan O'Neil Hughes has called “…the most advanced
sharpening in any of our products.” Here's how it works:
Advanced
Photoshop
Step One:
Start by applying your regular sharpening
to the overall image using Unsharp Mask
or Smart Sharpen (more on this coming
up next)—your choice. In this case, since
this is a portrait of a woman, I'd apply this
overall sharpening to just the Red channel
(see the tip on page 330 in this chapter).
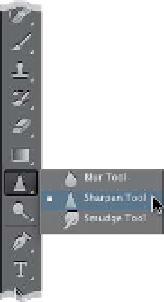
Now, get the Sharpen tool from the Tool-
box (it's found nested beneath the Blur
tool, as seen here). Once you've got the
tool, go up to the Options Bar and make
sure the Protect Detail checkbox (shown
circled here in red) is turned on (this is the
checkbox that makes all the difference,
as it turns on the advanced sharpening
algorithm for this tool).
Step Two:
I recommend duplicating the Back-
ground layer at this point (by pressing
Command-J [PC: Ctrl-J]
) and applying
this extra level of sharpening to this du-
plicate layer. That way, if you think the
sharpening looks too intense, you can
just lower the amount of it by lowering
the opacity of this layer. I also usually
zoom in (by pressing
Command-+
[plus
sign;
PC: Ctrl-+
]) on a detail area (like
her eyes), so I can really see the effects
of the sharpening clearly (another ben-
efit of applying the sharpening to a
duplicate layer is that you can quickly
see a before/after of all the sharpening
by showing/hiding the layer).


