Graphics Programs Reference
In-Depth Information
I learned this technique from my buddy, French photographer and Photoshop
trainer Serge Ramelli
(http://photoserge.com),
and it uses the Iris Blur filter in
Photoshop CS6 in a different way to take a nighttime photo and turn it into a
great background for compositing. Many thanks to Serge for teaching me the
technique, and for letting me share it with you.
Night Lights
Step One:
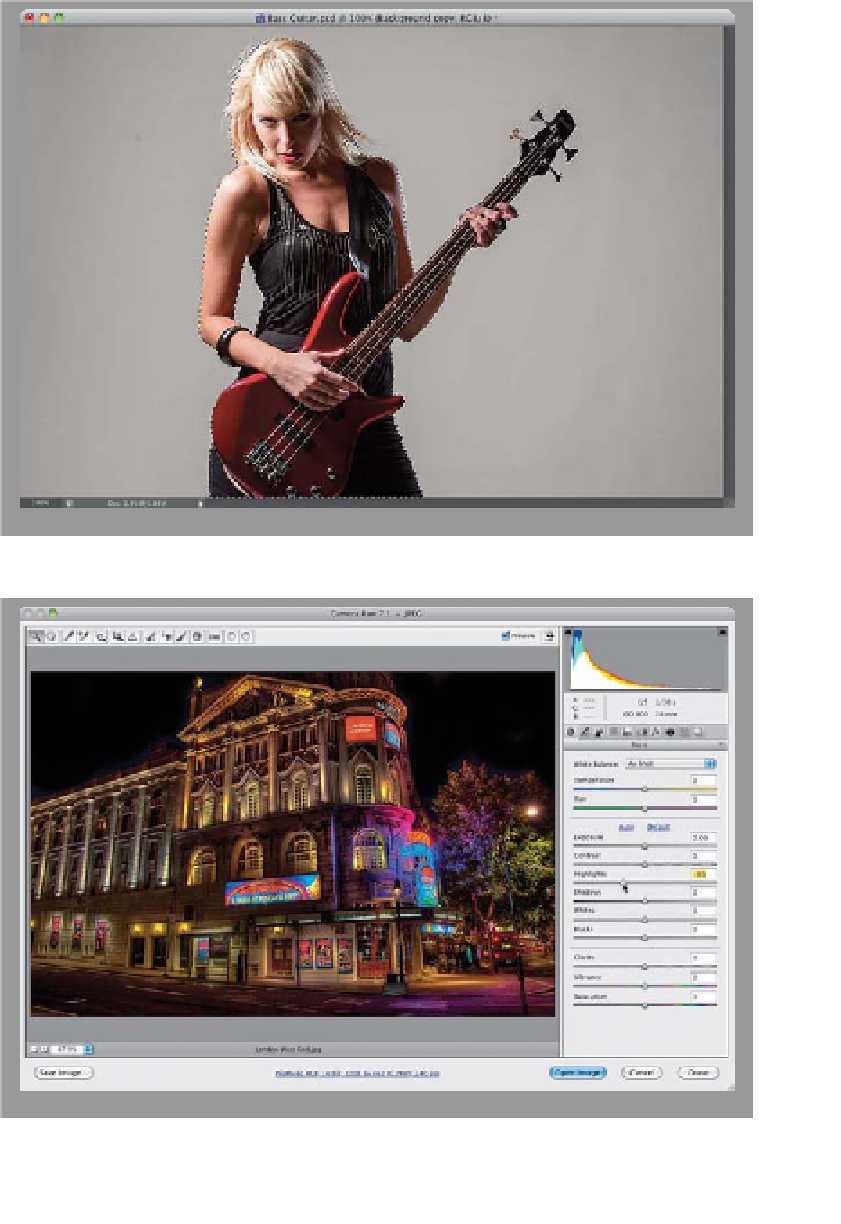
Start by opening an image of the subject
you want to put on our night lights back-
ground. Now, make a selection of your
subject using the technique for removing
people from their background (found
on page 231), which is the technique I
used here to select our subject playing
bass guitar.
Step Two:
Next, we're going to open a photo taken
at night where you can see lights (like the
one shown here). With this technique,
you don't actually want bright lights
(they'll turn into white blobs), but in the
shot I chose here, of course, there were
some bright lights, but there's a quick fix
for that. Open the image in Camera Raw
(see the beginning of Chapter 2 if you
need a refresher on that), and drag the
Highlights slider way over to the left until
the lights don't look so bright, as seen
here, where I dragged the slider to -30
(you can control the actual brightness of
the lights later, but for now they need to
be kind of “pulled back” in brightness).
Then, click the Open Image button to
open it into Photoshop.