Graphics Programs Reference
In-Depth Information
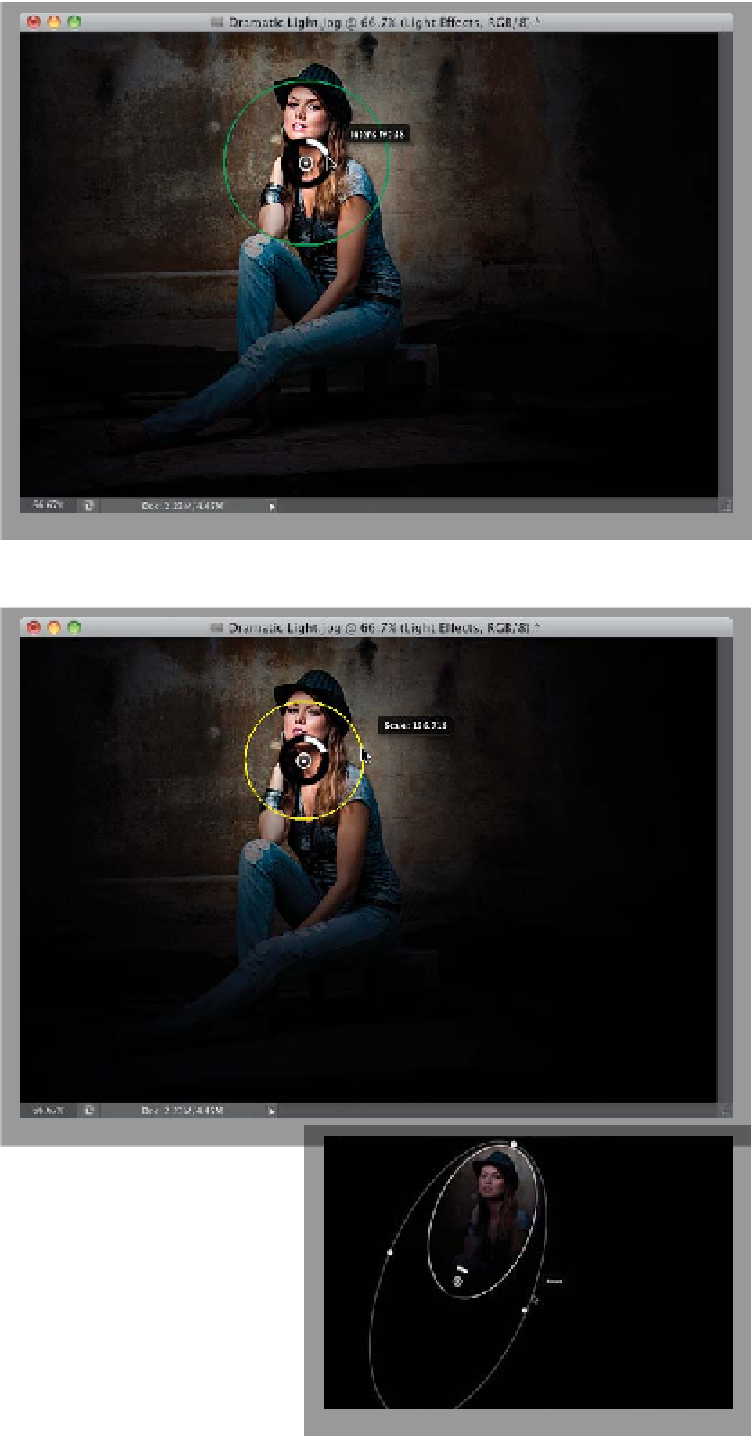
Step Four:
Her face should be the brightest part of
the portrait, but the light on her face is
a little too bright. Luckily, you can con-
trol the intensity of the light without hav-
ing to mess with any sliders—you do it
right on the image itself. The little black/
white circular ring that appears just out-
side the center of your light controls the
intensity of the light. Click on it and the
HUD will display “Intensity” and the cur-
rent amount of Intensity ranging from 0 to
100. To lower the amount a bit, click right
on that circle and drag in a counter-clock-
wise motion, and it lowers the brightness
(Intensity) of the light (as seen here, where
it appears that the light starts on her face
and falls off to darkness quickly.
Step Five:
Of course, the light will spill outside
your subject's face onto the background
quite a bit, but you can control the size
(Adobe calls it the “Scale”) of the round
beam of light, using the outermost ring
(the really big green one). Move your
cursor right over it and it turns yellow
and the HUD displays “Scale” and the
amount, from 0 to 100 (as seen here),
and then just drag inward/outward to
resize the beam. I have to tell you, this
green ring is kind of finicky and it might
take you moving your cursor over it a
few times really slowly to finally get the
yellow Scale ring to appear, so don't
let it get you frustrated if it doesn't work
the first time—just give it another try or
two. These three onscreen controls work
pretty much the same for the rest of the
lights, except for Spotlight—there, the
outer-ring controls rotation (as shown
here at the bottom), but you can click
on the white dots to move it.
(Continued)