Graphics Programs Reference
In-Depth Information
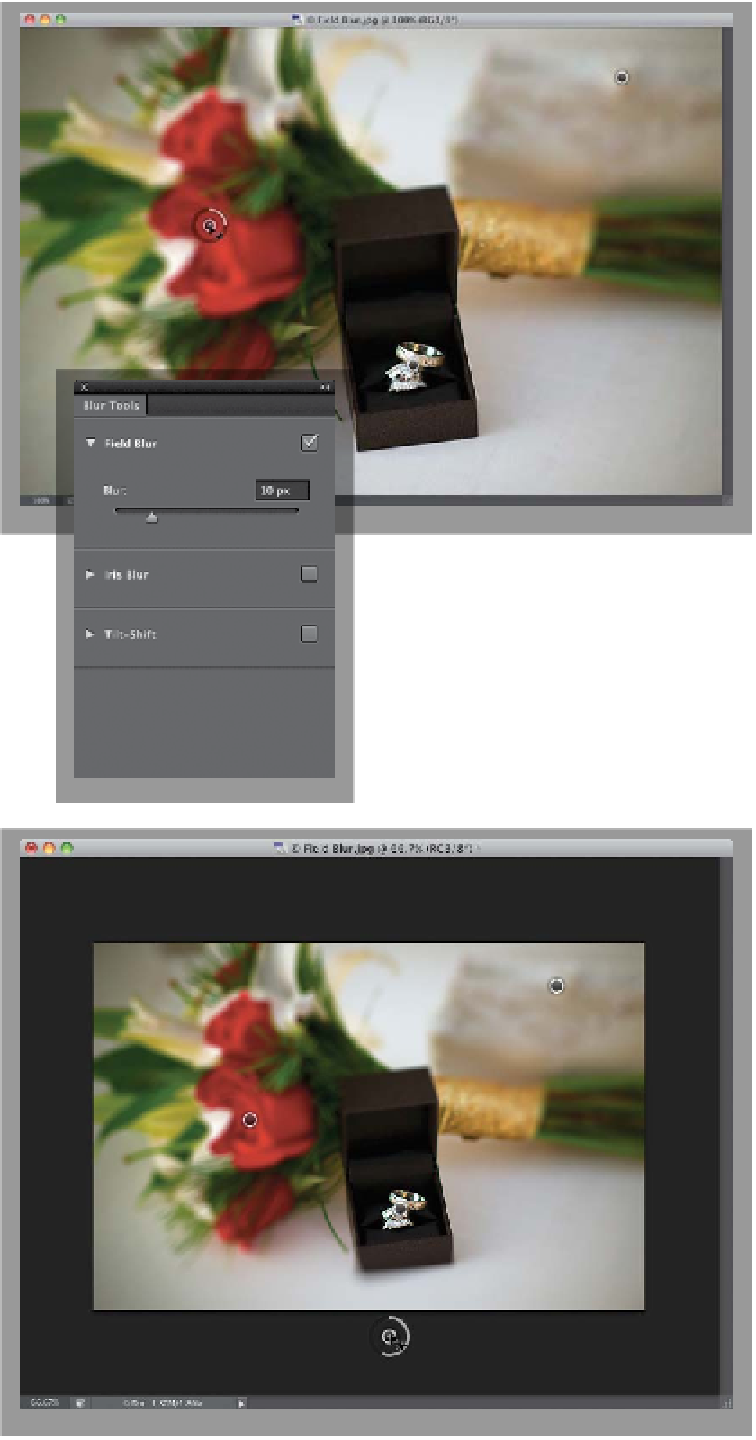
Step Eight:
The default amount of blur is 15 pixels,
and that might work for the bride's purse
in the background on the right, because
it's farther back, but the roses are closer
to the ring box. So, click on the pin on the
roses, then go to the Blur Tools panel and
lower the Blur slider to just 10 px (as seen
here), and now the roses aren't quite as
blurry. Now, click directly on the purse in
the back right (ya know, now that we've
brought it up) to add a new pin, and it
gets a 15-px blur by default. So, we have
three different controls in this image:
(1) on the purse on the right in the back,
a very blurry pin; (2) the rings have no
blur, as their pin's Blur slider is set to 0;
and (3) the roses are 33% less blurry than
the purse.
Step Nine:
Okay, so how would you blur the small
area in front of the ring box? Well, there's
a trick for that: First, you'll need to change
your Zoom tool settings (in the Options
Bar) so the Resize Windows to Fit check-
box is off, then you can press
Command--
(minus sign;
PC: Ctrl--
) to reduce the
image size, but not the window size, so
you can see the canvas area around your
image. Believe it or not, you can click the
Field Blur tool out in this canvas area to
add a blurry point. Here, I added one just
outside the image, and the edges of the
blur spill onto the image (just below the
ring box) to give us the final image.
(Continued)