Graphics Programs Reference
In-Depth Information
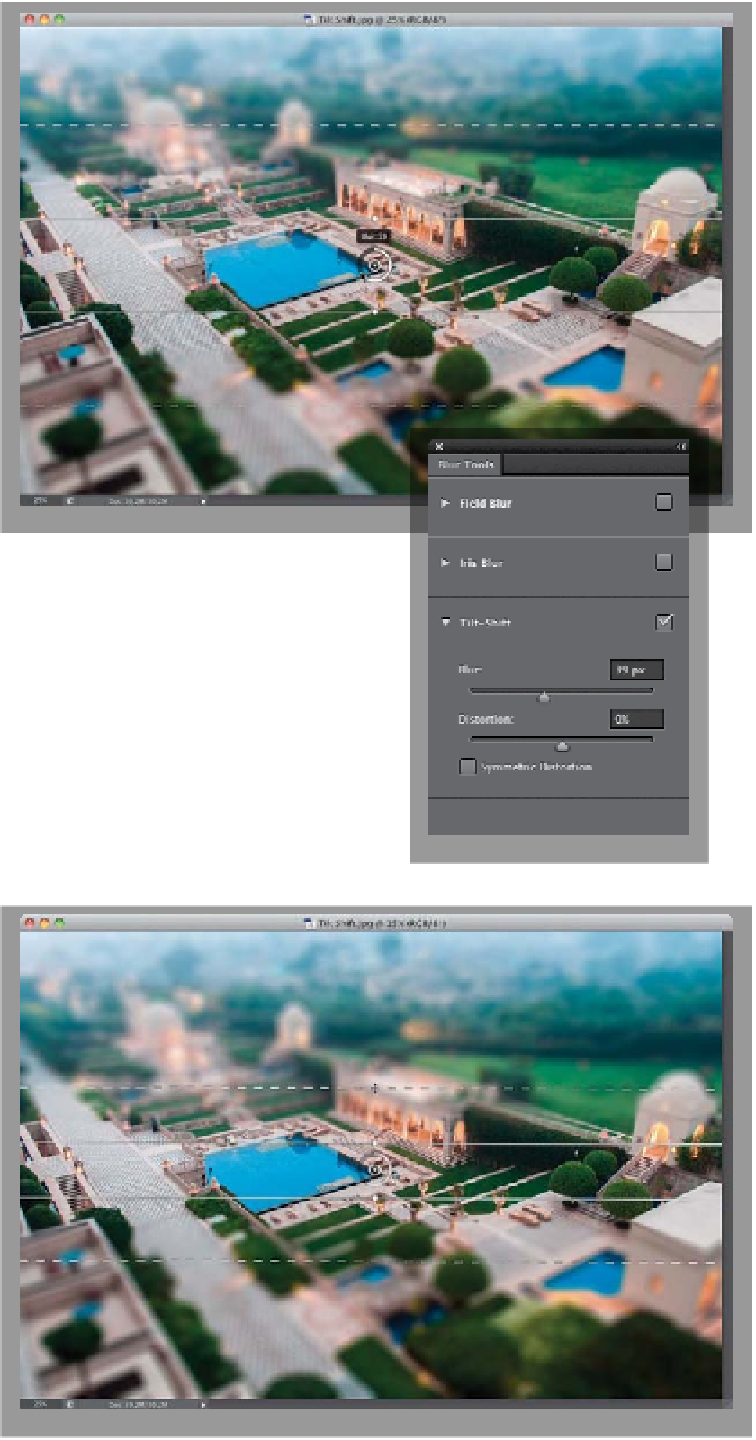
Step Three:
You control the amount of blur by click-
ing on the gray part of the ring around
the pin, and dragging around the ring.
As you drag, the ring turns white to show
you how far you've gone, and the actual
amount of blur appears in a little pop-
up display at the top of the ring (as seen
here). I totally dig adjusting the blur this
way, but if it gets on your nerves (hey, it
could happen), there is a Blur Tools panel
that appears over on the right side of your
workspace with a Tilt-Shift section. You'll
see a Blur slider there, so if you want to go
“old school,” you can drag that slider and
use it to choose how much blur you want.
In our example, I clicked-and-dragged the
ring (the Blur amount) to 39. While we're
here, look inside the two horizontal solid
lines. See how that area is sharp and in
focus? Okay, now look at the area out-
side those lines until you reach the dotted
lines. See how it transitions to blurry?
Got it? Got it!
Step Four:
For this particular miniaturization effect,
I think it looks better if you compress both
of these areas—making the in-focus area
smaller and the transition area smaller.
Here's how: Click directly on the top solid
line and drag inward toward the round pin
thingy in the middle (and yes, thingy is the
official name given by the International
Board of Unsure Naming, or the IBUN).
Get it nice and close (as seen here). Now,
do the same thing with the bottom solid
line, moving it up toward the round pin
thingy. Next, drag the center of the top
dotted line in closer to the top solid line
(as shown here), and then do the same to
the bottom dotted line.