Graphics Programs Reference
In-Depth Information
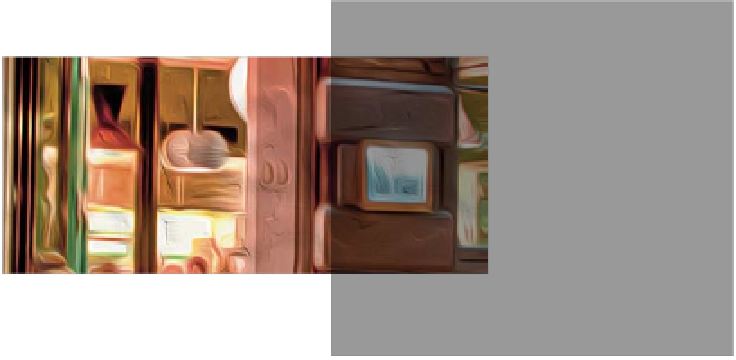
Step Five:
The Scale slider controls the size of your
brush, so dragging it way over to the left
would paint your image with a very thin
brush, and dragging it all the way over to
the right would paint it with a very thick
strokes. Take at look at the top example
here and you can see how tiny and de-
tailed those brush stroke are compared
with the strokes below when you set
the size (thickness) much larger. Totally
different look.
Brush Scale (thickness) set to 0.1
Brush Scale (thickness) set to 10
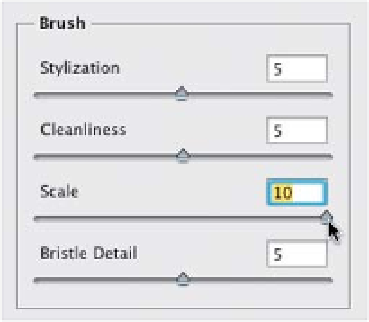
Step Six:
Okay, the last Brush slider should be
called the Sharpness slider, as it makes
the overall image look sharper or softer
in how it affects the brush. Dragging it
to the left takes away the detail of the
brush bristles, so it's very soft, smooth,
and undefined (like you see here at the
top). Dragging to the right gives it a
harder, more detailed look that makes
the image look sharper, as you really
see the bristles in the stroke now. Just
for the record, I'm glad there are only
four sliders here. :) Now, on to the
two lighting controls.
Brush Bristle Detail set to 0
Brush Bristle Detail set to 10