Graphics Programs Reference
In-Depth Information
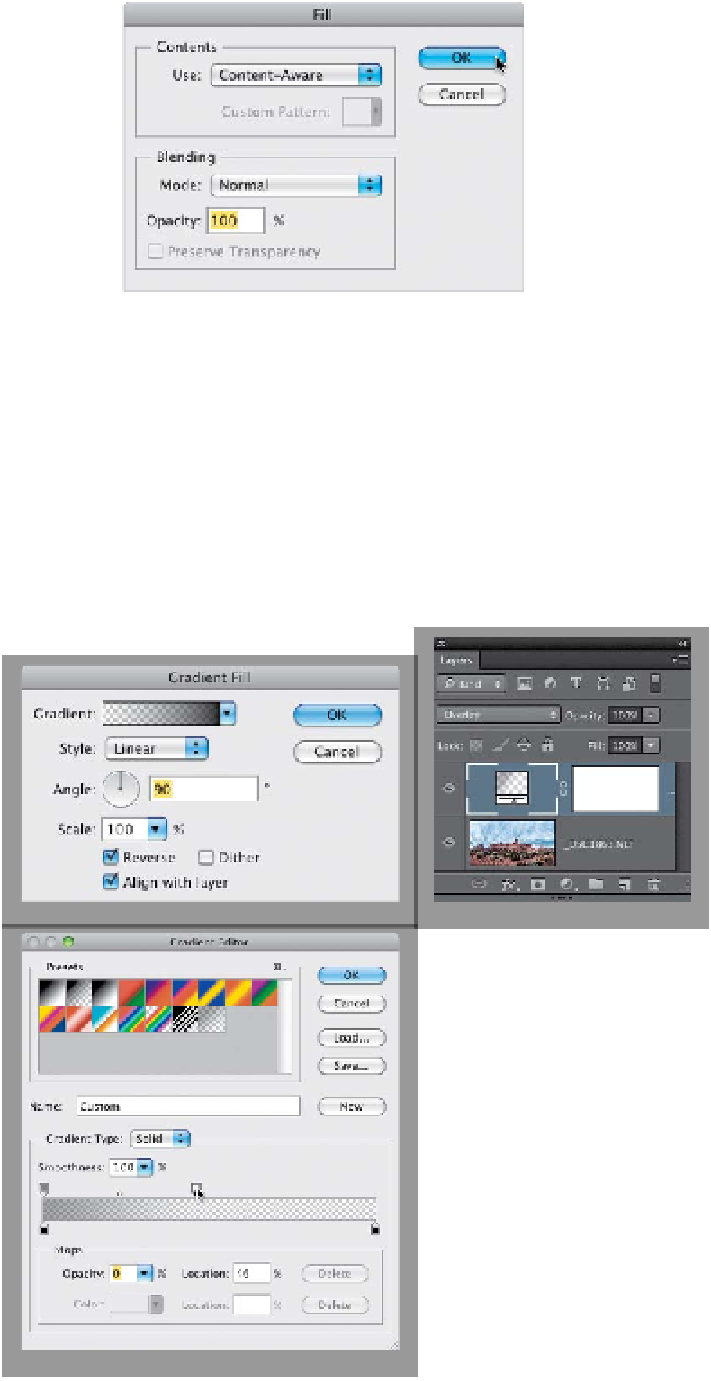
Step Eight:
Go under the Edit menu and choose
Fill
.
When the dialog appears (shown here),
from the Use pop-up menu at the top,
choose
Content-Aware
, then click OK,
sit back, and prepare to be amazed. Well,
most of the time it's pretty darn amazing.
Every once in a while, it's just way, way off
and you have to undo it and go a different
route. But, when it's fixing things like gaps
in the sky, or in a desert floor, or anything
that's kind of random by nature, it works
wonders, and in an image like this, it does
a really great job (as shown here). Press
Command-D (PC: Ctrl-D)
to deselect.
Step Nine:
Now for some finishing moves. I would
generally create a neutral density gradi-
ent filter effect here to darken the sky
(like we did in Camera Raw in Chapter 4),
which is simple to do in Photoshop. Click
on the Create New Adjustment Layer icon
at the bottom of the Layers panel and
choose
Gradient
from the pop-up menu.
When the dialog appears, turn on the
Reverse checkbox (otherwise, it does the
opposite of what you want—it darkens
the foreground instead of the sky). Now,
click on the Gradient itself to bring up
the Gradient Editor. Click on the last gra-
dient in the default Presets list—that's the
Neutral Density gradient. To control how
far down this gradient extends into your
image, click-and-drag the white Opacity
stop (shown circled here in the red) to the
left. The farther you drag, the shorter the
gradient extends down into your image.
I usually like it in the top ¼ to ¹/
³
of the sky.
When you're done, click OK twice, then,
in the Layers panel, change the blend
mode of this layer to
Overlay
.