Graphics Programs Reference
In-Depth Information
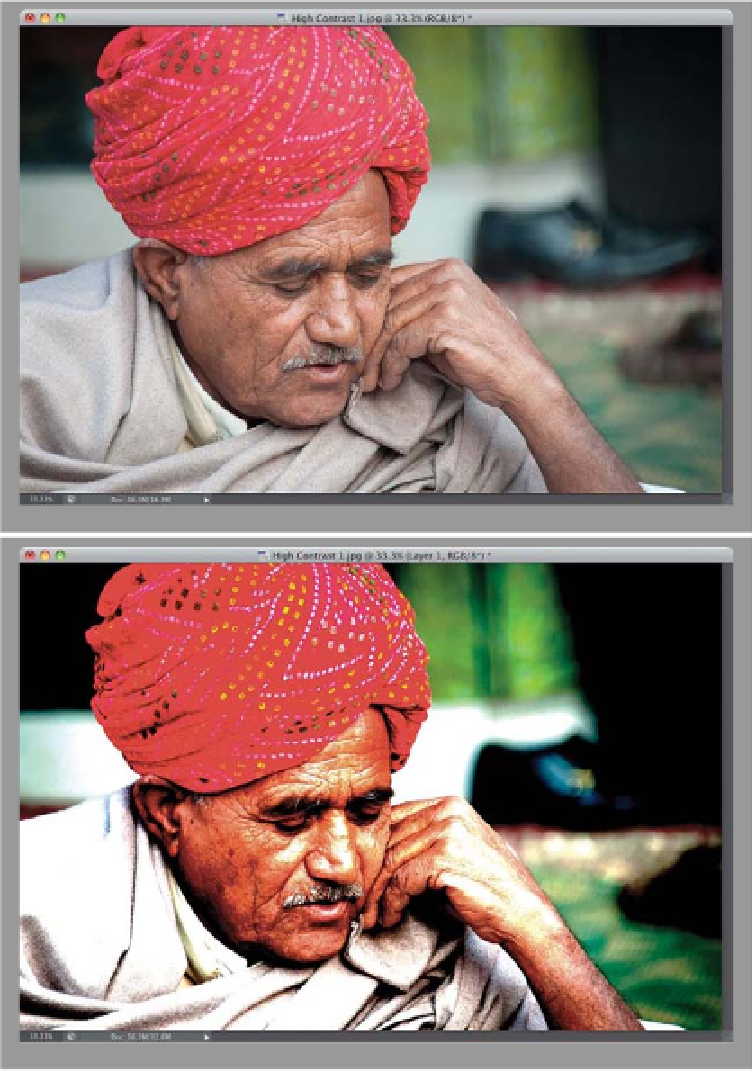
The super-high-contrast, desaturated look is incredibly popular right now, and while
there are a number of plug-ins that can give you this look, along with a Camera Raw
technique I'll show you next, I also wanted to include this version, which I learned
from German retoucher Calvin Hollywood, who shared this technique during a stint
as my special guest blogger at my daily blog
(www.scottkelby.com).
The great thing
about his version is: (1) you can write an action for it and apply it with one click,
and (2) you don't need to buy a third-party plug-in to get this look. My thanks to
Calvin for sharing this technique with me, and now you.
Portrait Look
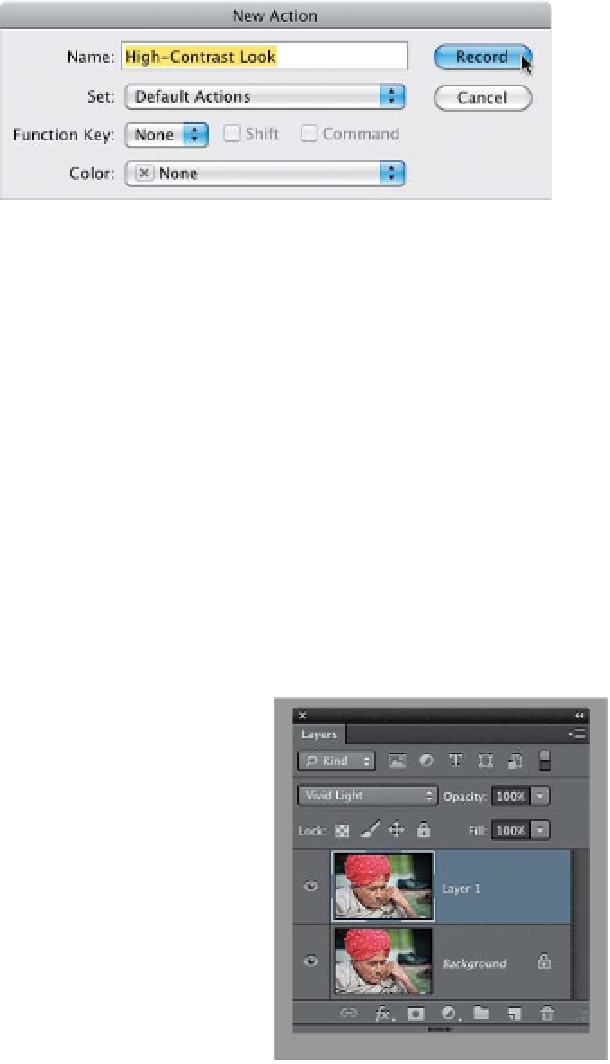
Step One:
Open the image you want to apply a
high-contrast look to. Let's start, right
off the bat, by creating an action to
record our steps, so when you're done,
you can reapply this same look to other
photos with just one click. Go to the
Actions panel, and click on the Create
New Action icon at the bottom of the
panel. When the New Action dialog ap-
pears, name this “High-Contrast Look”
and click the Record button. Now it's
recording every move you make…
every step you take, it'll be watching
you (sorry, I just couldn't resist).
Step Two:
Make a copy of your Background layer
by pressing
Command-J (PC: Ctrl-J)
.
Now, change the blend mode of this
duplicate layer to
Vivid Light
(I know it
doesn't look pretty now, but it'll get
better in a few more moves).