Graphics Programs Reference
In-Depth Information
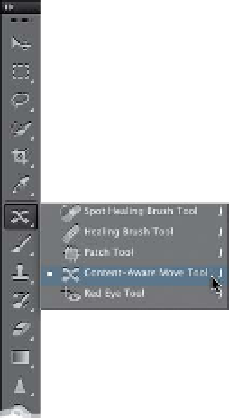
Step Three:
Next, go to the Toolbox, and get the
new Content-Aware Move tool (as shown
here—it's nested in the same menu as
the Healing Brush tool and Patch tool; or
just press
Shift-J
until you have it). Now,
click on your selected subjects and drag
them over to the right side of the image
(as shown here). The original of them
will still be in the same position for a
few seconds while Photoshop is freak-
ing out (kidding. While Photoshop is
doing its math).
Step Four:
When you release your mouse button,
it's going to take a few moments for
the magic to happen (depending on
how large your file size is), but then
you'll see that not only are your subjects
moved, but the hole that would normally
have been left behind is instead totally
patched and filled (as shown here). How-
ever, don't deselect quite yet. Leave your
selection in place—especially if it didn't
work well—because while it's still selected,
you can change how Photoshop creates
the background texture that blends with
your move. You do this from the Adapta-
tion pop-up menu up in the Options Bar.
What's nice is, since your selection is still
in place, you can choose a different op-
tion from that menu and it will re-render
your move. So, all you have to do is try
each one and choose the one that looks
the best (again, I do this only if there's a
problem). Also, the stricter the method
you choose, the more Photoshop uses
of the actual real background. This looks
more realistic in some cases, but it can
make the move look weird in others, so
it's best to try them all if it just doesn't
look right. (
Note:
If needed, you can also
switch to the Spot Healing Brush and
clean up any stray areas it left behind.)