Graphics Programs Reference
In-Depth Information
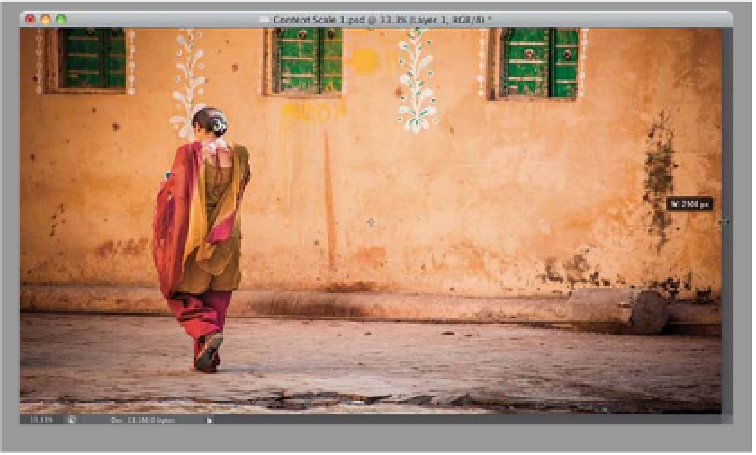
Step Two:
Get the Move tool
(V)
and click-and-drag
your photo into the widescreen document.
To shrink your image down so it fit s fully
inside the document, press
Command-T
(PC: Ctrl-T)
to bring up Free Transform (if
you can't reach the Free Transform han-
dles, press
Command-0
[zero;
PC: Ctrl-
0]
, and the image window will expand
enough so you can reach all the handles).
Press-and-hold the Shift key, click on a cor-
ner handle, and drag to resize your image.
When you get it so it fits fully inside the
document (as seen here), press the
Return
(PC: Enter) key
to lock in your resizing.
You can see the problem, here: to get it to
fit, without cropping, leaves white gaps to
the left and right of your image.
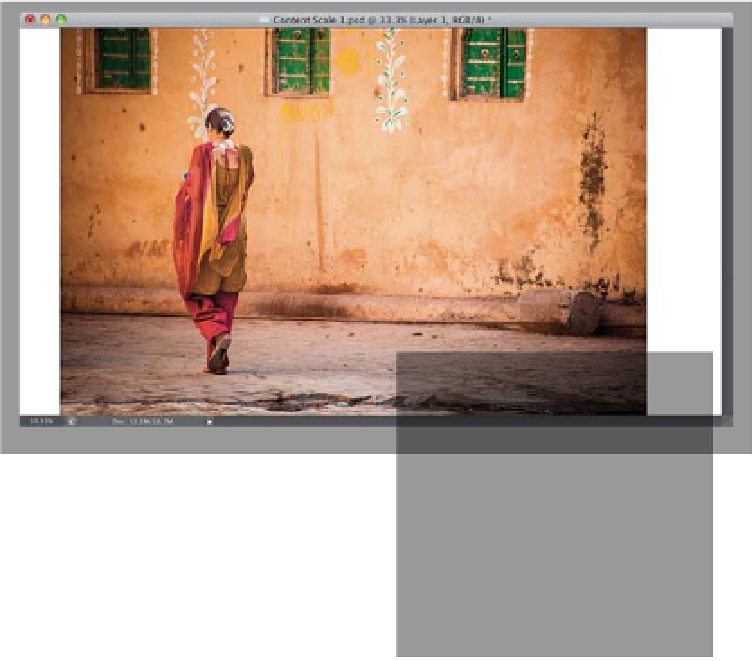
Step Three:
Now, you could just bring up Free Trans-
form again, drag the left side handle over
so it covers the gap on the left side, and
then do the same thing to stretch the
image over to the right side (as shown
here), but that stretches our subject out
and her body is now thicker and distor-
ted (take a look back at the image in
Step Two and you'll see how much wider
she looks here). This will not win you any
fans (or repeat business), so don't hit the
Return key to lock in your transformation.
Instead, hit the
Esc key
to cancel your
transformation. Then, go under the Edit
menu and choose
Content-Aware Scale
.