Graphics Programs Reference
In-Depth Information
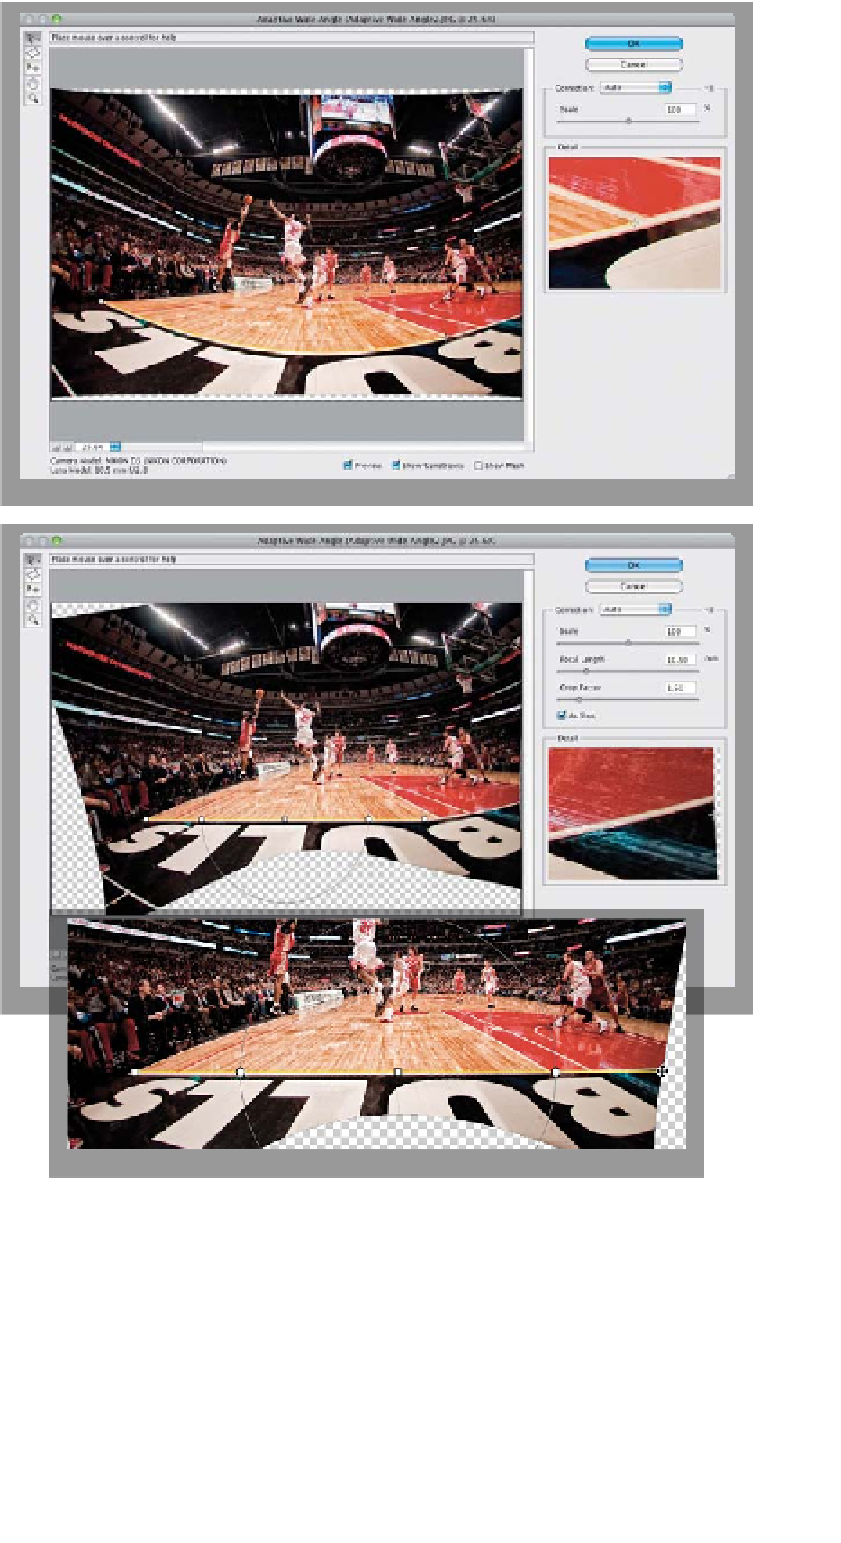
Step 11:
If you have an image where you know
that a part of it is supposed to be abso-
lutely level and flat (like a horizon line or,
in this case, the floor of the basketball
court), then before you drag out your
Constraint line, press-and-hold the Shift
key. Your line will turn yellow, and you'll
drag it out like usual along the curved
edge of the court (as shown here).
TIP: If Your Constraint
Lines Don't Bend
If Photoshop recognized your lens and
has a profile for it, then the lines will bend
automatically. But, if it doesn't recognize
your lens, then there's no lens profile for
it to work from (if you choose Auto correc-
tion, a warning dialog will appear telling
you that no matching lens profile was
found), and it's then up to you to make
the bend manually. Just click the Con-
straint tool on one end of what you want
to fix, then click it again on the other end
to complete your straight line. Then, click
on the center point within the circle and
bend the line so it fits.
Step 12:
Here's the result of our Shift-clicking: the
floor is straight and flat. Well, most of it is.
Take a look at the far-right side of it. See
how it bends up? To fix that, just click-
and-drag the point on the right end of
the line out to the right. You'll see the line
automatically bend up along the floor and
then when you release your mouse but-
ton, it will immediately straighten it out,
as seen here at the bottom (that's pretty
amazing when you think about it).
TIP: Straightening Rectangles
If you need to quickly fix something
like a doorway or window (a rectangle),
then use the Polygon Constraint tool
(the second tool down in the toolbar),
which works like the Polygonal Lasso
tool—just trace around your rectangle
and it straightens it.