Graphics Programs Reference
In-Depth Information
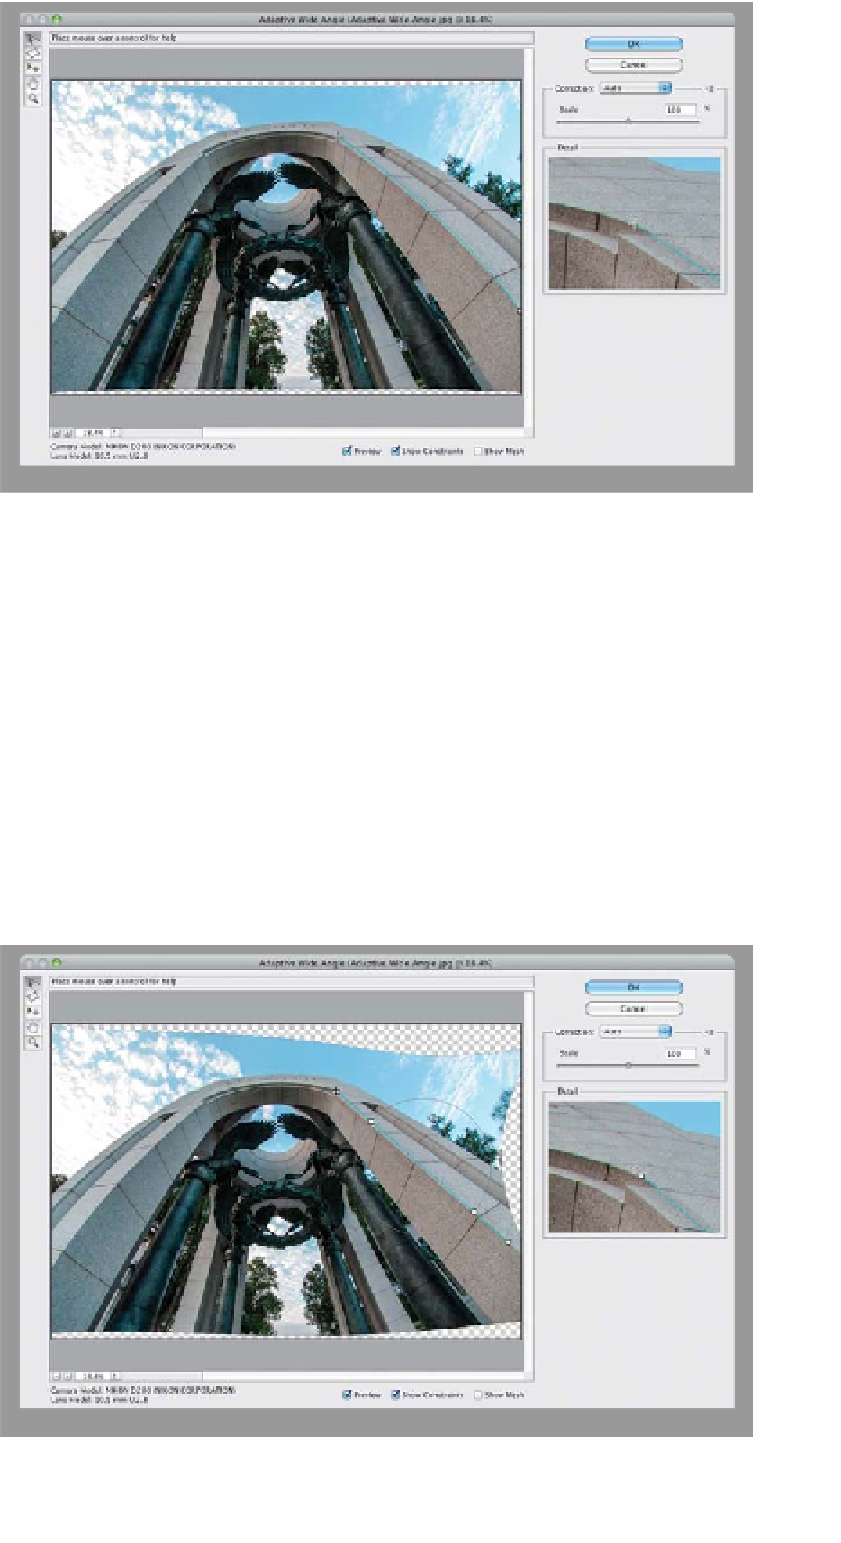
Step Three:
We help the filter do its thing by letting
it know which parts of the image need
to be fixed, and we do that using the
Constraint tool (it's the default tool and
the first one in the toolbar in the top left).
Basically, you click at the base of the
object you want straightened (like the
column on the right side here), and then
as you move your cursor up toward the
top of the object, the green line you're
dragging literally bends (it does this auto-
matically, because it knows the lens you
used and what kind of problems you're
dealing with). You get a zoomed-in close-
up of where your cursor is currently lo-
cated in the Detail preview on the right
side of the dialog (as seen here), which is
really handy for situations like this where
you want the end of your line to be right
along an edge (see how it's off a bit in
the Detail preview?).
Note:
If you mess up,
you can delete a Constraint line by just
press-and-holding the Option (PC: Alt)
key, clicking once on it, and it's gone.
Step Four:
Once you click your mouse near the top
of the column (like I did here), it straight-
ens that column. It also gives you a pre-
view of the cropping work that you'll
need to do pretty shortly (either that,
or Content-Aware Fill, but you can see
how it's having to the warp the image
around to pull this straightening trick off).
Also, if part of the top or bottom of the
column still looks bent after adding the
Constraint line, you can grab the end of
the line near where the problem is and
literally just drag it out longer. That will
usually get rid of the problem, even if
you have to drag it off the image area.
If you do, you can move your image over
in the preview window, so you can reach
that end handle if you need to tweak it
again, by switching to the Adaptive Wide
Angle's own Move tool (it's the third tool
down in the toolbar).