Graphics Programs Reference
In-Depth Information
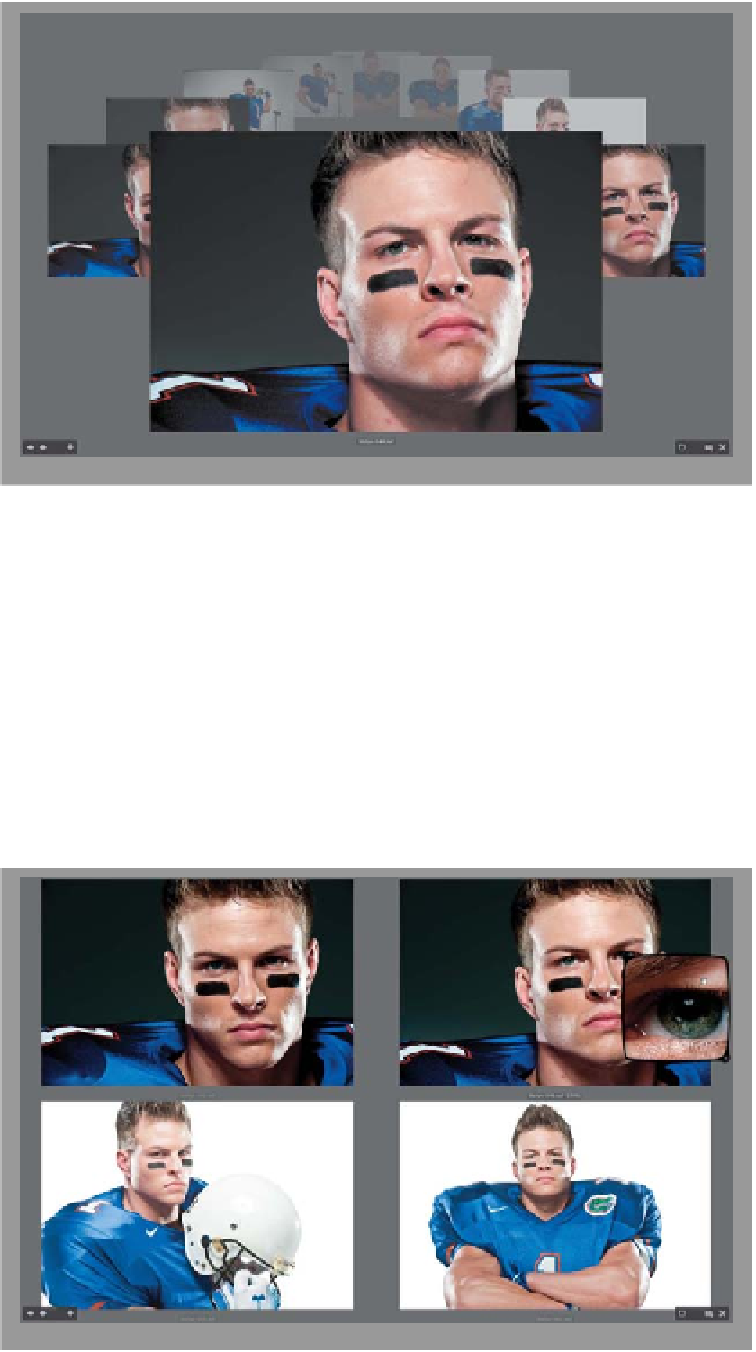
Step Three:
The second reason to use Review mode
is to help you narrow things down to just
your best photos from a shoot. Here's
how: Let's say you have five or six simi-
lar photos, or photos of a similar subject
(in this case, a football player), and you
want to find the single best one out of
those. Start by Command-clicking (PC:
Ctrl-clicking) on just those photos (in the
filmstrip) to select them, and enter Review
mode. As you move through the photos
(using the Left and Right Arrow keys on
your keyboard), and you see one come to
the front that's not going to make the cut,
just press the
Down Arrow key
on your
keyboard (or click the Down Arrow but-
ton onscreen) and that photo is removed
from the screen. Keep doing this until
you've narrowed things down to just
the final image.
Step Four:
Like I mentioned, once you fall below
five images, you no longer get the car-
ousel view. Instead, it looks more like
regular Full Screen Preview mode—it's
just full screen (as seen here). In Review
mode, you can zoom in tight on a parti-
cular area using the built-in Loupe. Just
move your cursor over the part of the
photo you want a closer look at, and
click to bring up the Loupe for that photo
(as shown here, in the image in the top
right). To move it, click-and-hold inside
the Loupe and drag it where you want
it. To make it go away, just click once in-
side it. Once you've whittled things down
to just your keepers, you can give each a
star rating (like a 5-star rating by pressing
Command-5 [PC: Ctrl-5]
)—more on this
on the next page.