Graphics Programs Reference
In-Depth Information
Step Five:
Once your selection looks pretty decent,
it's time to unlock the real selection power
(the Quick Selection tool is just the warm-
up act). Go up to the Options Bar and
click on the Refine Edge button (shown
circled here). This is where the magic hap-
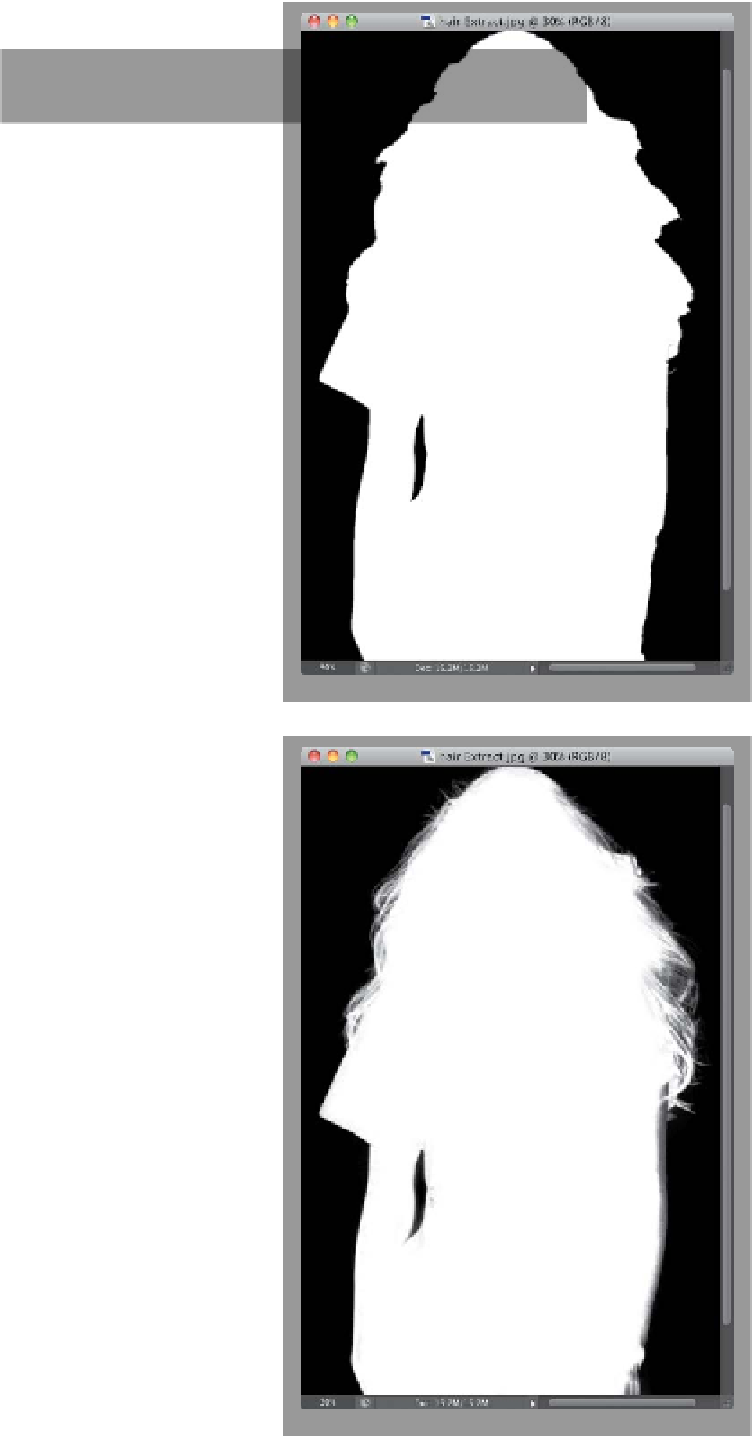
pens. In the Refine Edge dialog, you have
a number of choices for how you can view
your selected image (including just the
standard old marching ants), but just for
now, as part of our learning process, go
ahead and choose
Black & White
, from
the View pop-up menu. This shows your
selection as a standard layer mask. As you
can see, the Quick Selection tool, by itself,
isn't gettin' the job done (the edges are
jaggy and harsh, and there's no wispy hair
selected at all). That's okay, though, be-
cause we're just gettin' started.
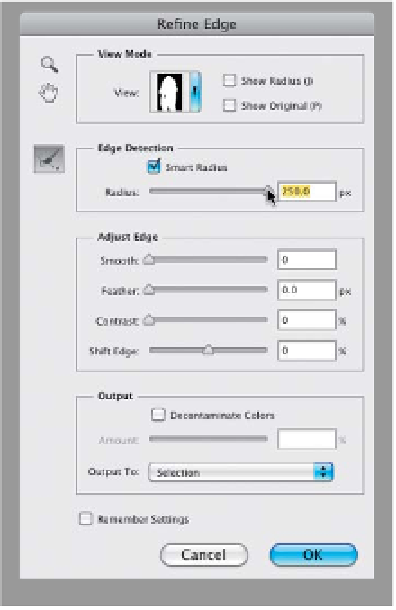
Step Six:
Next, turn on the Smart Radius check-
box (you won't see anything happen yet,
but turn it on anyway). Smart Radius is
the edge technology that knows the dif-
ference between a soft edge and a hard
edge, so it can make a mask that includes
both. This checkbox is so important that
I leave it on all the time (if you want it al-
ways on, as well, just turn it on and then
turn on the Remember Settings check-
box at the bottom of the dialog). Now,
again, just for learning purposes, drag the
Radius slider all the way over the right (to
250), and all of her hair gets selected in-
stantly (pretty amazing isn't it?). While it
did a great job on her hair, there are parts
of her (like her right arm) that are being
“over-selec ted.” Those areas will wind up
being transparent, and you don't want
that, so we always have to back it way
down. But, I just wanted you to see the
incredible math at work.
(Continued)