Graphics Programs Reference
In-Depth Information
Step Three:
Now, here's something else I've learned
about the Quick Selection tool: while it's
pretty good at selecting, it's not nearly
as good at deselecting areas that you
don't want selected (like that gray area
between her arm and her shirt). I've found
that when it misses areas like that, you're
honestly better off switching to the Magic
Wand tool
(Shift-W)
, pressing-and-hold-
ing the
Option (PC: Alt) key
, and just
clicking once in that area to instantly de-
select it. So, let's go ahead and do that
under her arm, and you'll see that in just
that one click with the Magic Wand tool,
that area is deselected (as shown here).
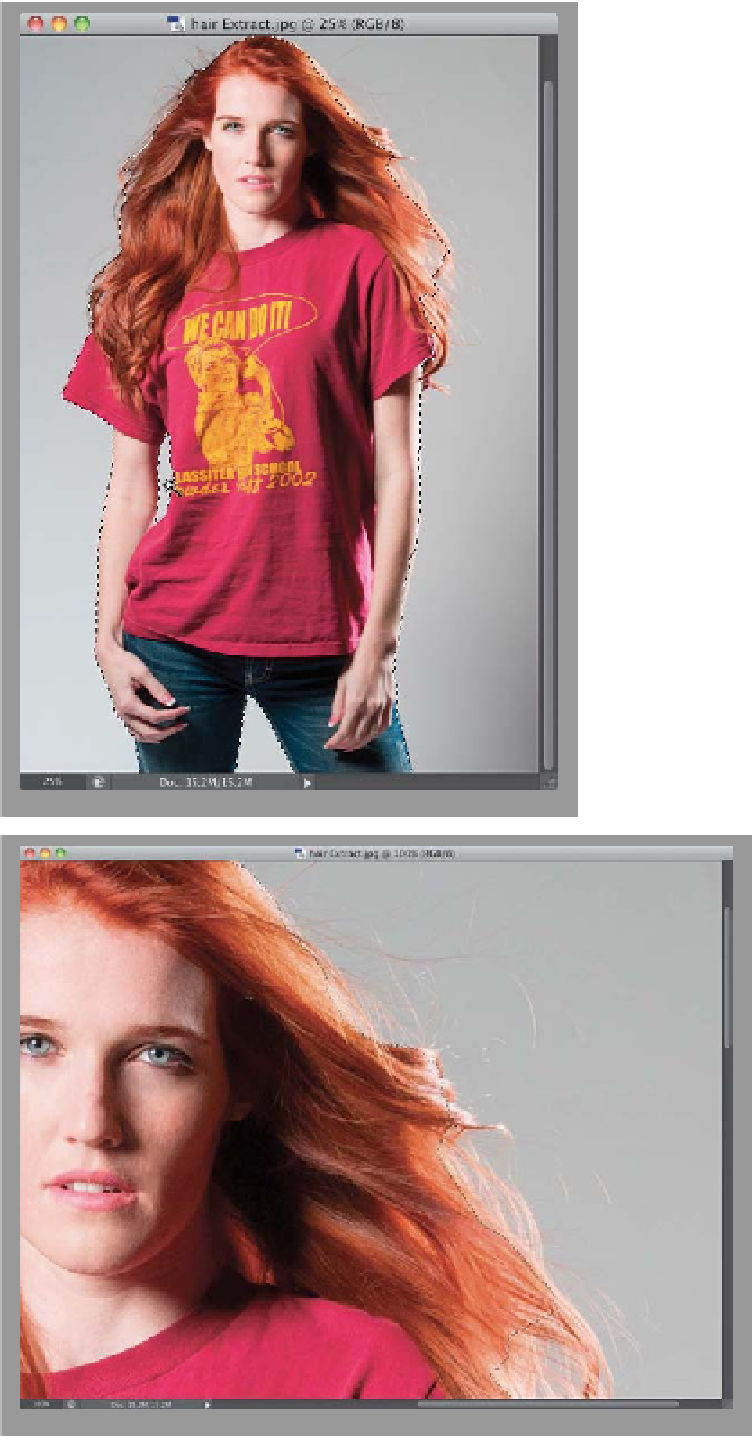
Step Four:
Okay, here comes a very important part
of this stage of the process, and that is
making sure that when you select her hair,
you don't select any background area with
it. In other words, don't let there be any
hair selected with gray background show-
ing through. In fact, I basically follow the
rule that I don't get too close to the out-
side edges of my subject's hair unless
an area is pretty flat (in other words, no
fly
away, tough-to-select hair in that area).
You can see what I mean in the close-up
here, where I avoided the thinner edges
of her hair (we'll let Photoshop select
those hard parts—we'll just get close
to the edge then stop). Also, you can
see where I stopped before some areas
where the hair is finer. Again, we'll let
Photoshop grab those parts later, but for
now we're most concerned with avoiding
selecting areas where you can see gray
background through her hair. If you ac-
cidentally select an area with gaps, then
it's okay to switch back to the Quick Sel-
ection tool, press-and-hold the Option
(PC: Alt) key, and paint over those gap
areas to deselect them.
.