Graphics Programs Reference
In-Depth Information
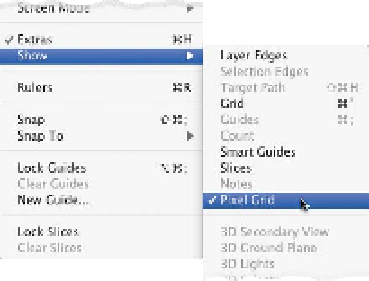
Zooming In Really Tight? There's
a Pixel Grid to Help You Out
You won't see this neat lit tle feature un-
less you zoom in to 600% magnification
or more—it's a little pixel grid that appears
that makes it visually easier to tell pixels
apart when you're zoomed in crazy tight.
It's on by default (give it a try—zoom in
crazy tight and see), but if you want to turn
it off, just go under the View menu, under
Show, and choose
Pixel Grid
.
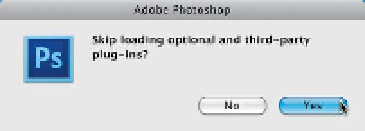
Keeping Your Third-Party Plug-Ins
from Loading into Photoshop
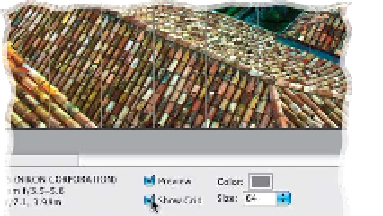
Editing the Lens Correction Grid
When you use the Lens Correction filter
in CS6, the first thing you'll notice is that
“annoying grid” isn't tur ned on by default
(by the way, the only reason it was annoy-
ing was because it used to be turned on
by default). Now, not only is it off by de-
fault, but you can edit the size and color of
the grid itself. When you turn on the Show
Grid checkbox at the bottom of the Lens
Before you launch Photoshop, press-and-
hold the Shift key. A dialog will appear
and, if you click the Yes button, it disables
any third-party plug-ins. This can come in
handy if you think you're having a problem
in Photoshop caused by one. If you restart
with them disabled and the problem goes
away, you've probably found your culprit.
Create a New Document
Just Like the Last One
There's a super-handy, yet little known
shortcut, that lets you create a brand new
document using the exact same specs
(size, resolution, color mode, etc.) as the
last one you made. Instead of choosing
Command-N (PC: Ctrl-N)
to bring up
the New dialog, just press
Command-
Option-N (PC: Ctrl-Alt-N)
, and when the
New dialog appears, all the specs for your
last document will be entered for you.
Correction dialog, a Size field and a color
swatch become available to the right of the
checkbox. Also, although there is a grid
in the Lens Corrections panel of Camera
Raw (press
V
to toggle it on/off), you can't
change the size or color of that grid.
Hide All Your Panels Fast
If you want to focus on your photo, and
temporarily hide your Toolbox, Options
Bar, and all your panels, just press the
Tab
key
. Press it again to bring them all back.
Saving Time in HDR Pro
The more images you use to create your
HDR images, the longer it takes HDR Pro
to compile your final image, so this is a
case where less is more. I usually use five
images (as I explained at the beginning
of this chapter), but an interesting tid-
bit I learned from one of the Photoshop
product managers is that, for the best
results, you need more darker photos
than lighter ones. So, if you don't mind
the extra wait, you're better off having
just one image with a really bright expo-
sure and four darker ones, than you are
with an equal balance.
Duplicate Multiple Layers at Once
Pressing
Command-J (PC: Ctrl-J)
is not
only the fastest way to duplicate a layer, it
is also now the fastest way to duplicate
multiple layers. Just go to the Layers panel,
Command-click (PC: Ctrl-click) on the lay-
ers you want duplicated to select them,
then use that same shortcut to duplicate
all the selected layers (this is new in CS6).
Renaming Multiple Layers Fast
Want to rename a bunch of layers?
Just double-click directly on the first
layer's name to highlight it, type in a
new name, and then press the
Tab key
to jump to the next layer and its name
field will be highlighted, ready to be
renamed. The Tab key takes you to the
next layer down; to jump back to a
previous layer, press
Shift-Tab
.