Graphics Programs Reference
In-Depth Information
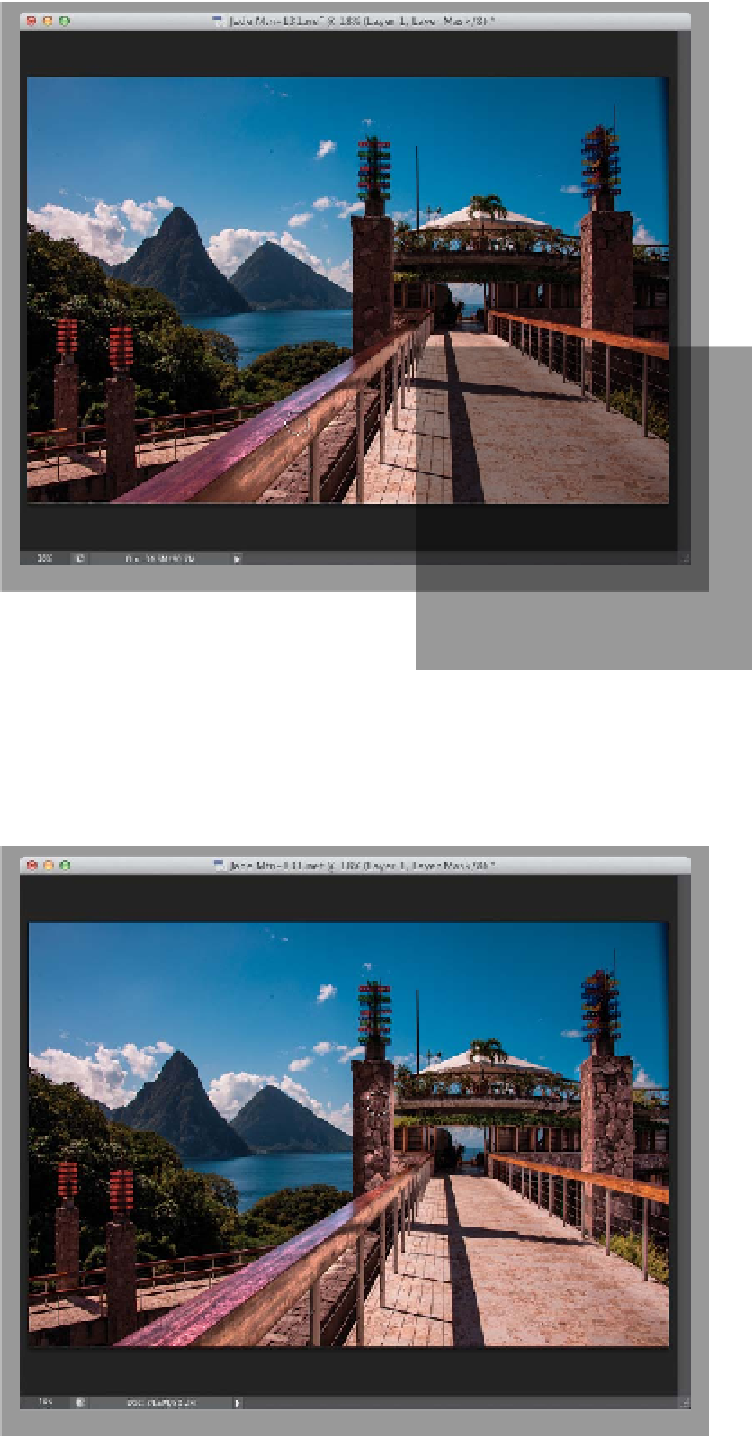
Step Nine:
Now, if things look aligned correctly,
switch your blend mode back to Normal
(if not, keep nudging this top image a
pixel or two until they're right on the
money). Next, click on your top layer, so
that only it is active, press-and-hold the
Option (PC: Alt) key, and click on the
Add Layer Mask icon at the bottom of
the Layers panel to hide the HDR image
layer behind a black mask. Get the Brush
tool
(B)
, choose a soft-edged brush from
the Brush Picker in the Options Bar and,
since your mask is black, you need to
paint in the opposite color, so make sure
your Foreground color is set to white.
Now, begin painting over the parts of the
image that you want to have a more HDR
look. For example, here I'm painting over
the railing on the left side, and it reveals
the railing on the HDR image layer, which
has more detail and dimension than the
original image has.
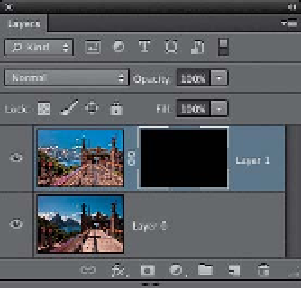
Step 10:
So, that's the plan: paint in white over
things where you want more detail and
dimension from the HDR image layer.
For example, I'd paint over the building
(but, I'd avoid the tent on the top, which
looks okay), then I'd paint over the stone
columns in front (as seen here), and you
can see the effect it's having. All that
detail is coming out now, but look at our
sky and the mountains—they look real-
istic. We're kind of blending fantasy and
reality in the same image.