Graphics Programs Reference
In-Depth Information
We've all seen HDR images where parts of the image look funky, with big glows
around the edges of things and dark or black skies that look obviously “HDR'd,”
plants and trees that look plastic, and lots of weird-looking areas that instantly tip
you off that you're looking at a heavily “HDR'd” image (and not in a good way).
The technique we're going to learn here takes the image with the regular exposure
and blends it with the HDR image to get the advantages of a tone-mapped HDR
image, without all that bad stuff that can come with it. That way, people say,
“Hey, is that an HDR image?” instead of, “Oh, that's been HDR'd!”
Creating a
Blended HDR
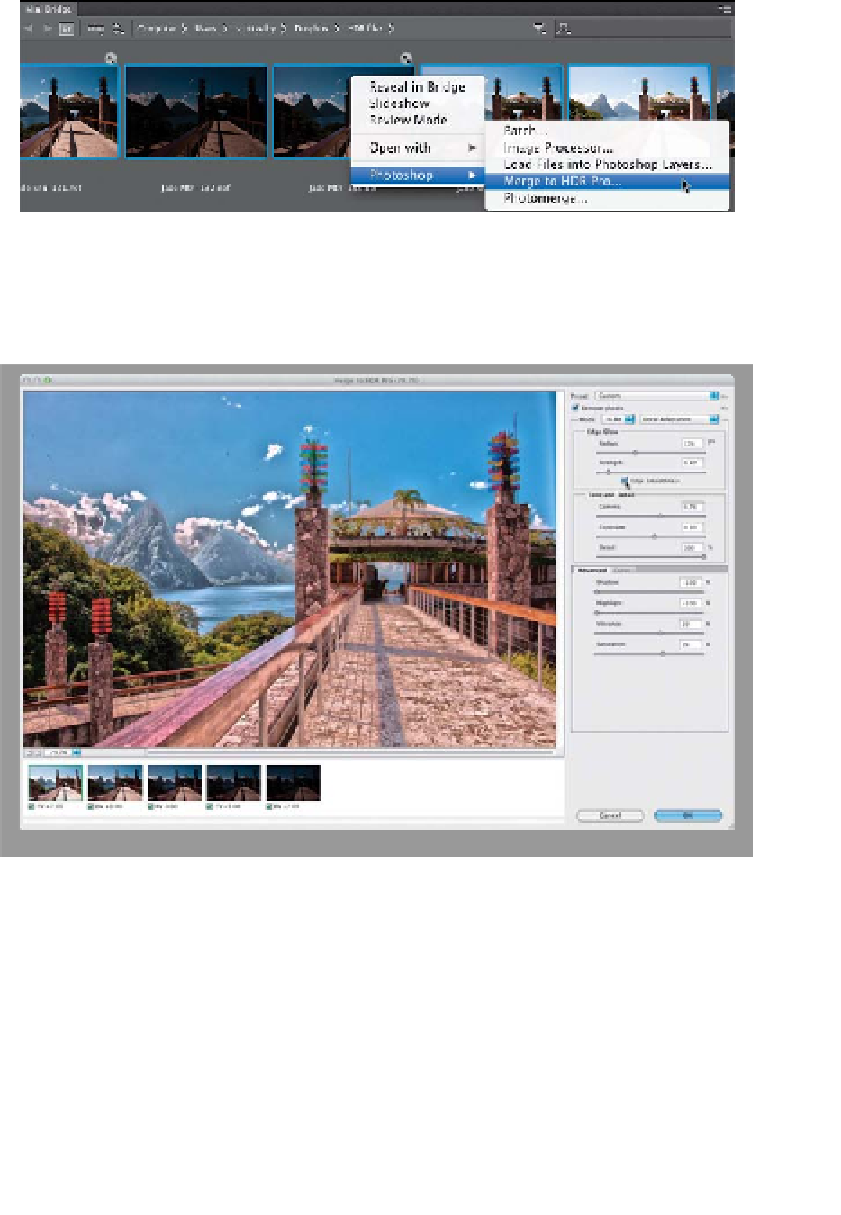
Step One:
Go to Mini Bridge, select your brack-
eted photos, then Right-click on any
one of those thumbnails and, from the
pop-up menu that appears, under
Photoshop, choose
Merge to HDR
Pro
(as shown here).
Step Two:
When the Merge to HDR Pro dialog ap-
pears, go ahead and choose the
Scott5
preset from the Preset pop-up menu at
the top right of the dialog. Then, turn
on the Edge Smoothness checkbox (as
shown here) to reduce some of the harsh
edges around the Piton mountains off in
the distance and on the edges of the rail-
ing's shadow in the foreground. When
you do this, you can see some of the
funky stuff I was talking about up in the
intro—a fakey-looking sky, glows around
the mountains and the two colorful glass
creations on top of the two columns in
the foreground. The sidewalk is so tex-
tured now it almost looks like they need
to clean it, and the trees on the left side
look a bit “HDR'd” (not to mention, I ap-
parently have a lot of sensor dust on my
camera, because there are little spots and
specks visible all over the sky, which we'll
deal with later, so don't worry—we will
deal with them). For now, just click OK to
open the over-HDR'd image in Photoshop.