Graphics Programs Reference
In-Depth Information
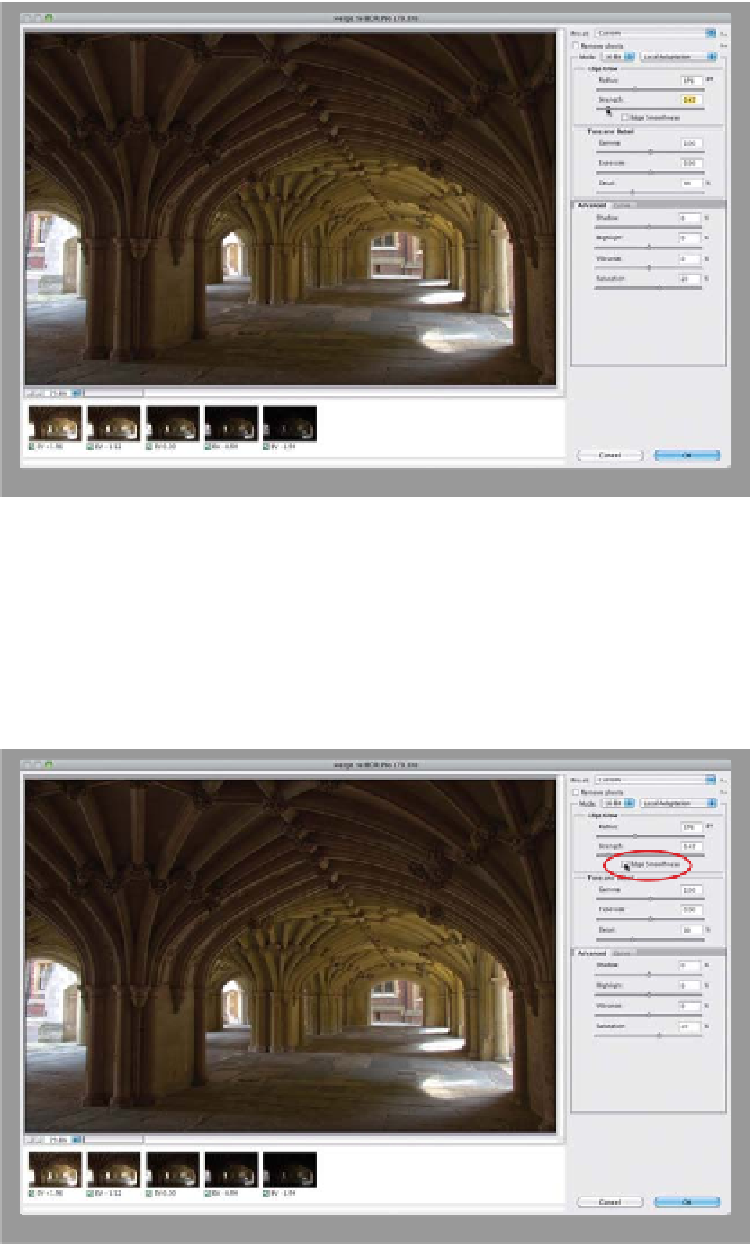
Step Three:
As I mentioned in the previous (Down
& Dirty) HDR project, there's a Preset
pop-up menu at the top right of the
dialog, and you might be tempted to
choose one of those presets, until you
actually try a few (well, I'm kind of partial
to Scott5, but outside of that one, and
maybe City Twilight or RC5, my guess is
that'll be the last time you try 'em. Yes,
they're that bad). Anyway, ignore those
for now, and just know that, instead, a lot
of your editing work will be spent find-
ing a good balance between the two
Edge Glow sliders. The Radius slider
controls the size of the edge glow, and
the Strength slider controls the contrast
of that glow. Move these two sliders in
small increments and you'll stay out of
trouble. In my Scott5 preset, I set the
Radius at 176 and the Strength at 0.47
(as shown here).
Step Four:
A new feature in Photoshop CS6 is Edge
Smoothness (at the bottom of the Edge
Glow section) and it's well named—when
you turn it on, it kind of smooths out the
edges a bit, but at the same time, it also
enhances the detail. If you turn it on at
this stage of the game (when you've only
tweaked the Radius and Strength sliders),
it's not going to look like it's doing much
of anything (and right now, it's not), but
once we juice this baby up and turn it on,
then I think you'll really like it (but as with
any slider, it doesn't look good on every
image, so you'll just have to try it and see).
For now, let's keep it turned off, and once
we crank things up, we'll come back and
turn it on, and you'll get a better look at
what it really does.