Graphics Programs Reference
In-Depth Information
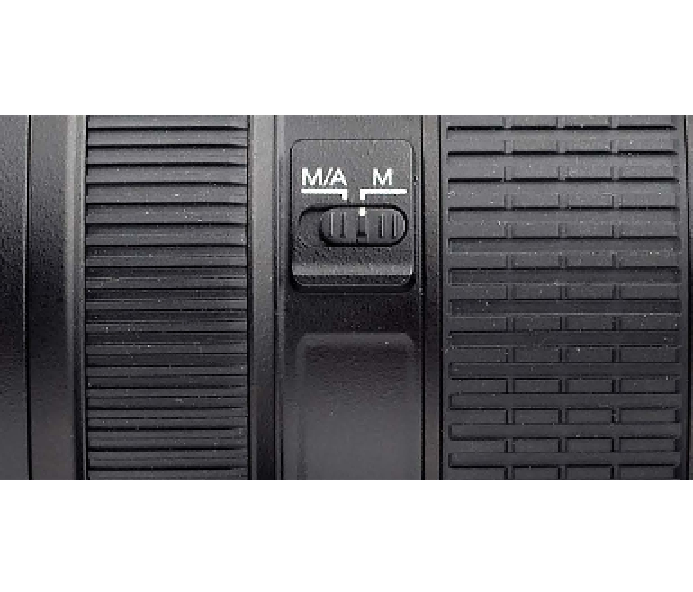
Step Three:
Go ahead and compose your shot,
and focus on the scene you want to
shoot. Once it's in focus, switch your
lens to Manual focus. That way, while
your camera is taking multiple shots, it
doesn't accidentally change focus. Now,
just so we're clear, you're not going to
manually focus—you're going to use
Auto focus just like always, but once
it's focused on your scene, just switch
off Auto focus, and then don't touch
the lens.
Step Four:
Now we set up the camera to shoot
bracketed, which tells the camera to
shoot the regular exposure, and then
extra photos that are exposed both
brighter and darker. The minimum
number of exposures you can use for
HDR is three, but I generally take five
bracketed photos for my HDR images
(although some folks take as many as
nine). So, with five, I wind up with one
shot with my normal exposure, then two
darker shots (one 1 stop underexposed
and one 2 stops underexposed), fol-
lowed by two brighter ones (one 1 stop
overexposed and one 2 stops over-
exposed). Here's how to set up your
camera to shoot bracketed (we'll start
with a Nikon D3S, for example): To turn
on bracketing on a Nikon D3S, press
the Fn (function) button on the front of
the camera, below the lens. Then use
the main command dial to choose how
many exposures to bracket (the control
panel on the top of the camera shows
the bracketing settings; choose 5F, so
you get five bracketed shots). Use the
sub-command dial (in front of the shutter
button) to set the bracketing amount to
1 stop (as seen here).
(Continued)