Graphics Programs Reference
In-Depth Information
Don't let the fact that this technique fits neatly on one page make you think it's
not a rocking technique, because this is the best and fastest duotone technique
I've ever used (and it's the only one I use in my own workflow). I used to do a more
complicated version, but then my buddy Terry White showed me a technique
he learned from one of his buddies whose duotones he adored, and well…now
I'm passing it on to you. It's very easy, but man does it work like a charm.
Crazy Easy
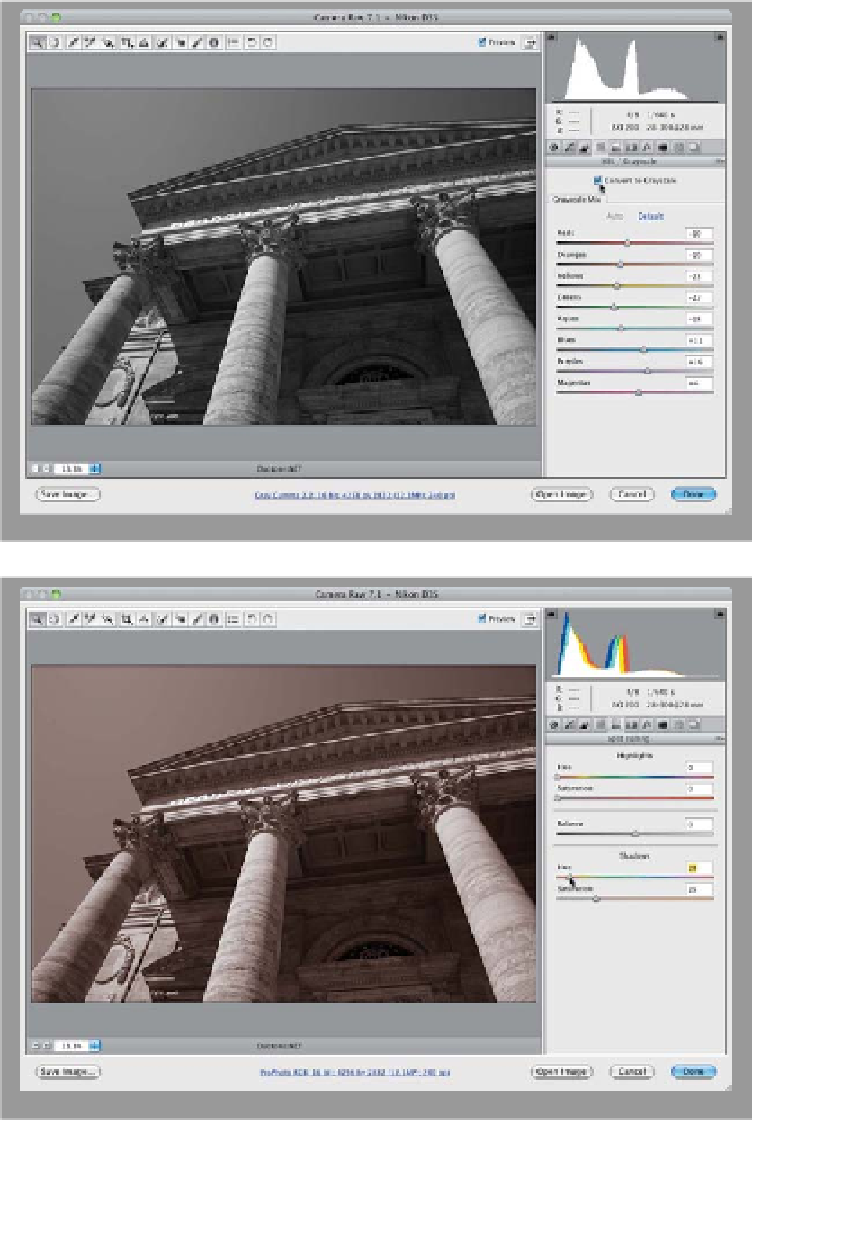
Step One:
Start by converting your color image
to black and white by clicking on the
HSL/Grayscale icon (the fourth icon from
the left) at the top of the Panel area and
then turning on the Convert to Grayscale
checkbox at the top of the panel (see
page 154 for one of my favorite methods
for converting to black and white).
Step Two:
Now, click on the Split Toning icon at the
top of the Panel area (it's the fifth icon
from the left), and then, in the Shadows
section, increase the Saturation amount
to 25 as a starting point. Next, just drag
the Shadows Hue slider until you have
a nice sepia-tone hue (I generally use
something around 28). If you think it's too
intense, lower the Saturation and you're
done. That's right—completely ignore the
Highlights controls altogether, and you'll
love the results you get (ignore the pow-
erful pull of the Highlights sliders. I know
you feel on some level that they will make
things better, but you are already hold-
ing the magical key to great duotones.
Don't blow it!). That's it—that's the whole
ball of wax (I told you it was easy, but
don't let that fool you. Try printing one
of these and you'll see what I mean).
Mmmm. Duotone.