Graphics Programs Reference
In-Depth Information
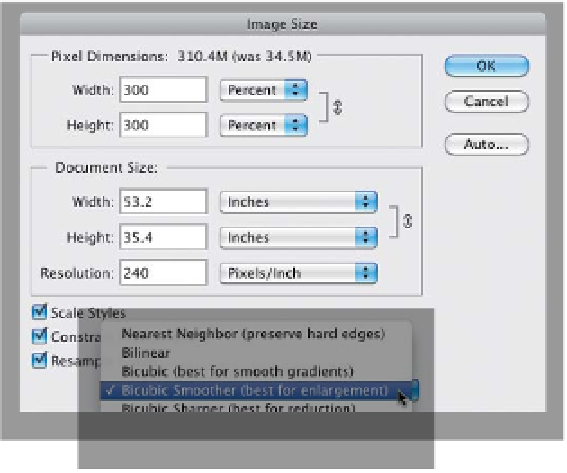
Step Three:
At the bottom of the dialog is a pop-up
menu that decides which algorithm is
used to upsize your photo. The default
is Bicubic Automatic, and I use that for
most everyday resizing stuff, but when
it comes to jumping in big increments,
like 200% or 300%, I switch to
Bicubic
Smoother
(which Adobe says is “best
for enlargement”), as shown here.
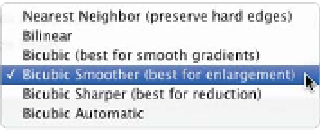
Step Four:
My buddy (and Epson printing expert)
Vincent Versace breaks this rule. Accord-
ing to Vincent's research, the key to his
resizing technique is to not use the
sampling method Adobe recommends
(Bicubic Smoother), but instead to choose
Bicubic Sharper, which he feels provides
better results. So, which one is the right
one for you? Try both on the same image
(that's right—just do a test print), and see
if you can see a visible difference. Here's
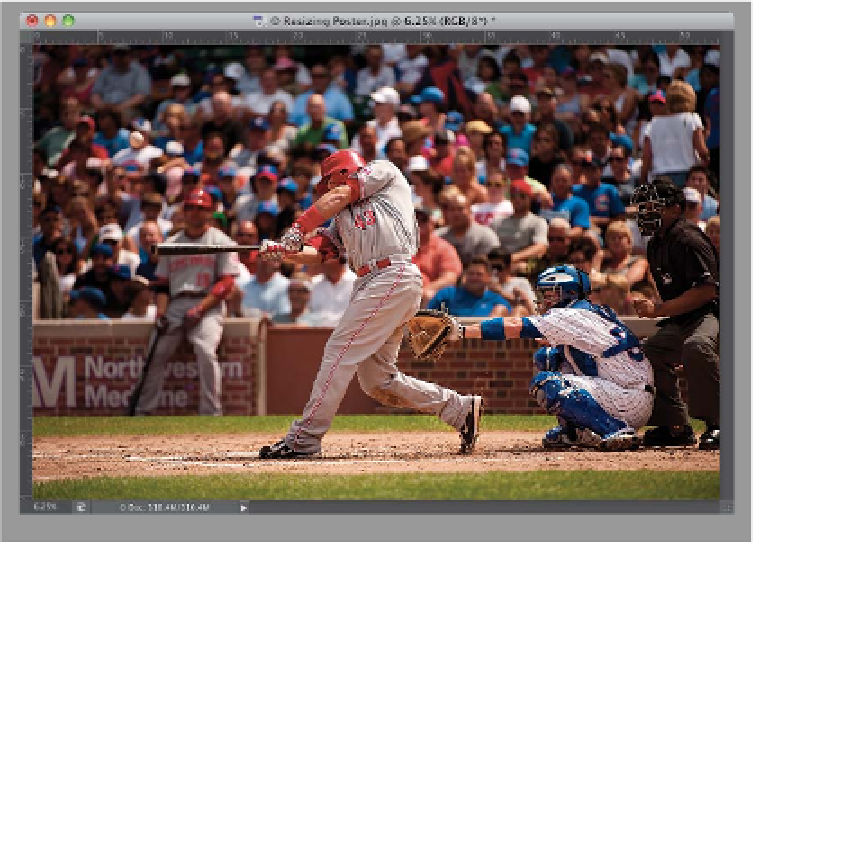
the final image resized to around 53x35"
(you can see the size in the rulers by
pressing
Command-R [PC: Ctrl-R]
).