Graphics Programs Reference
In-Depth Information
Although it's more of an advanced technique, creating your own custom tools
isn't complicated. In fact, once you set them up, they will save you time and money.
We're going to create what are called “tool presets.” These tool presets are a series
of tools (in this case, Crop tools) with all our option settings already in place so, we
can create a 5x7", 6x4", or whatever size Crop tool we want. Then, when we want to
crop to 5x7", all we have to do is grab the 5x7" Crop tool preset. Here's how:
Own Custom
Crop Tools
Step One:
Press the letter
C
to switch to the Crop
tool, and then go under the Window
menu and choose
Tool Presets
to bring
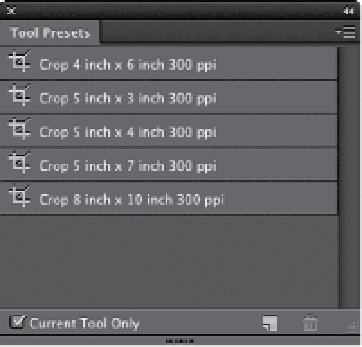
up the Tool Presets panel. You'll find that
five Crop tool presets are already there.
(Make sure that the Current Tool Only
checkbox is turned on at the bottom of
the panel, so you'll see only the Crop
tool's presets, and not the presets for
every tool.)
Step Two:
Go up to the Options Bar and enter the
dimensions for the first tool you want to
create (in this example, we'll create a Crop
tool that crops to a wallet-size image). In
the Width field, enter 2 in, then press the
Tab key
to jump to the Height field, enter
2.5 in, and press Return (PC: Enter).
Note:
If you want to include the resolution in
your tool preset, go to the pop-up menu
at the left end of the Options Bar, and
choose
Size & Resolution
. Enter your
Height, Width, and Resolution in the
dialog that appears, and click OK.