Graphics Programs Reference
In-Depth Information
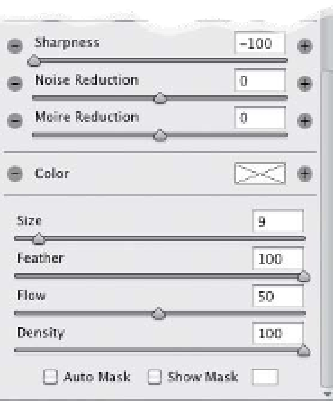
Painting a Gaussian Blur
Okay, technically it's not a Gaussian blur,
but in Camera Raw, you can paint with
a blur effect by lowering the Sharpness
amount (in the Adjustment Brush panel)
below 0 (actually, I'd go all the way to
How to Set the Color to None
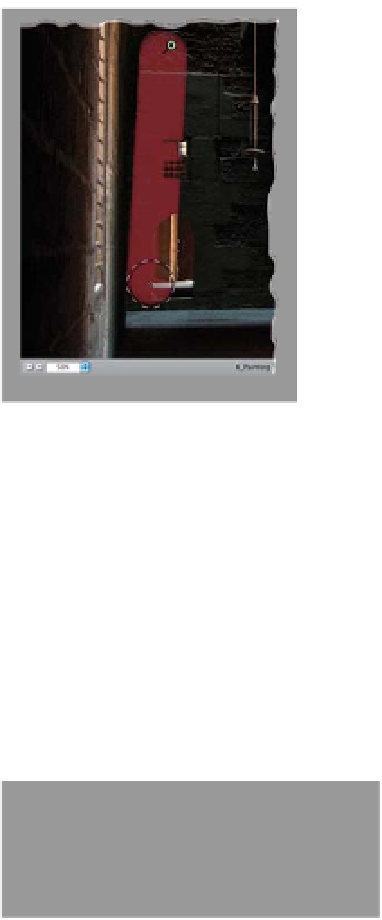
Painting Straight Lines
If you want to paint a straight line
using the Adjustment Brush, you can
use the same trick we use with Photo-
shop's Brush tool: just click once where
you want the line to start, press-and-
hold the Shift key, then click once where
you want the straight line to end, and
the Adjustment Brush will draw a per-
fectly straight line between the two.
Really handy when working on hard
edges, like the edge of a building
where it meets the sky.
-100 to get more of a Gaussian-type blur
look). This is handy if you want to add
a blur to a background for the look of
a more shallow depth of field, or one
of the 100 other reasons you'd want to
blur something in your photo.
Once you pick a color using the Adjust-
ment Brush's Color Picker, it's not really
obvious how to reset the color to None
(no color). The trick is to click on the Color
swatch (in the middle of the Adjustment
Brush options panel) to reopen the Color
Picker, then drag the Saturation slider
down to 0. Now, you'll see the X over
the Color swatch, letting you know it's
set to None.
Why There Are Two Cursors
When you use the Adjustment Brush,
you'll see there are two brush cursors
displayed at the same time, one inside
the other. The smaller one shows the
size of the brush you've selected; the
larger (dotted-line circle) shows the
size of the feathering (softening) you've
applied to the brush.
Save a “Jump Back” Spot
If you're familiar with Photoshop's
History panel, and how you can make
a snapshot at any stage of your editing,
so you can jump back to that look with
just one click, well…good news: you can
do that in Camera Raw, too! You can save
a snapshot while you're in any panel by
pressing
Command-Shift-S (PC: Ctrl-
Shift-S)
. Then you can jump back to
how the image looked when you took
that snapshot by clicking on it in the
Snapshots panel.
How to See Just One of Your Layers
Just
Option-Click (PC: Alt-click)
on the
Eye icon beside the layer you want to see,
and all the others are hidden from view.
Even though all the other layers are hidden,
you can scroll through them by pressing-
and-holding the
Option (PC: Alt) key
, and
then using the
Left
and
Right Bracket
keys
to move up/down the stack of layers.
Want to bring them all back? Just Option-
click on that Eye icon again.