Graphics Programs Reference
In-Depth Information
Retouching
One of the main things we've always had to go to Photoshop for was retouching
portraits, but now, by using the Spot Removal tool, along with the Adjustment
Brush, we can do a lot of simple retouching jobs right here in Camera Raw,
where they're completely non-destructive and surprisingly flexible.
Portraits in
Camera Raw
Step One:
In the portrait shown here (which I shot
on stage during my
Light It, Shoot It,
Retouch It
class at the Photoshop World
Conference & Expo), we want to make
three retouches: (1) we want to remove
any blemishes and soften her skin, (2) we
want to lighten the whites of her eyes,
brighten her eyes in general, and add
contrast, and (3) we want to sharpen her
eyes, eyebrows, and eyelashes.
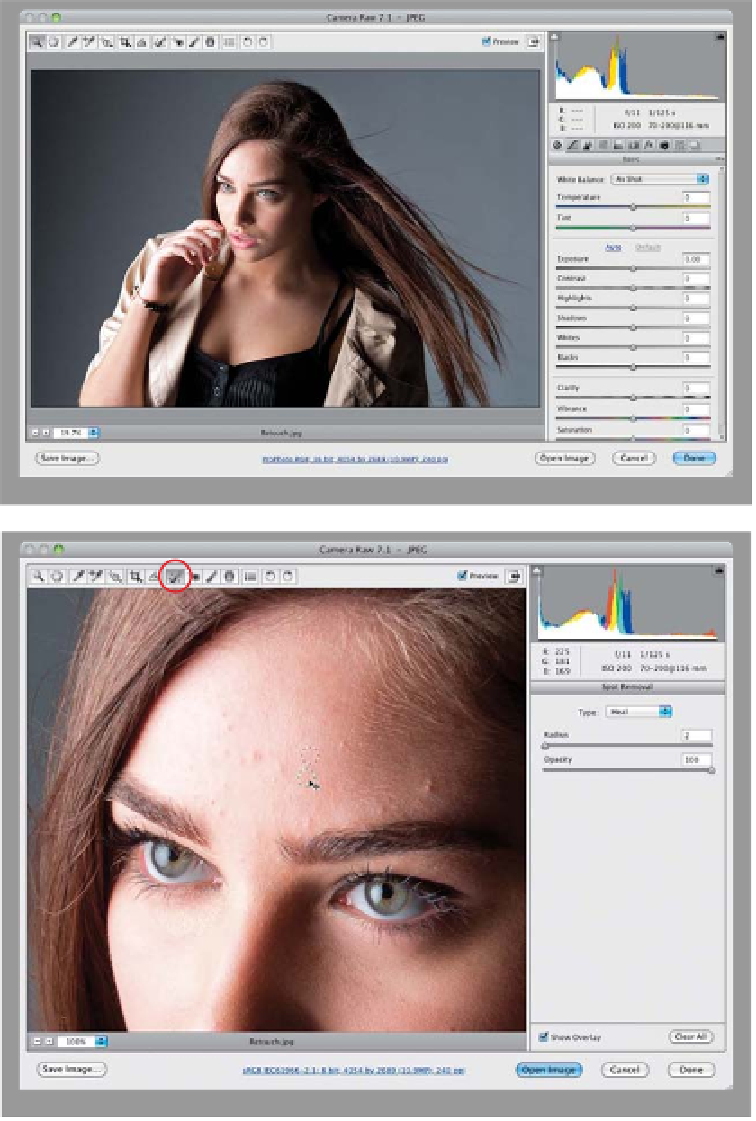
Step Two:
We'll start with removing blemishes. First,
zoom in on her face, then get the Spot
Removal tool
(B)
from the toolbar up top
(it's shown circled here in red) and set your
brush Radius (a fancy name for the brush's
size) to where it's just slightly larger than
the blemish you want to remove. Now,
move your cursor over the blemish and
just click. Don't paint a stroke or any-
thing—just click once and it's gone. If
the removal doesn't look quite right, it
just means that Camera Raw chose a bad
place to sample clean skin from to make
its repair. So, click on the green sample
circle and drag it to a nearby area and it
redoes the retouch (as shown here). Now,
remove the rest of the blemishes with just
a single click each, adjusting the position
of their green sample circles, if necessary.