Graphics Programs Reference
In-Depth Information
One of my favorite features in Camera Raw is the ability to make non-destructive
adjustments to individual areas of your photos (Adobe calls this “localized corrections”).
The way they've added this feature is pretty darn clever, and while it's different than
using a brush in Photoshop, there are some aspects of it that I bet you'll like better.
We'll start with dodging and burning, but we'll add more options in as we go.
and Adjusting
Individual Areas
of Your Photo
Step One:
This photo has two areas that need
completely different adjustments:
(1) the sky needs to be darker with more
vibrant colors, and (2) the plane needs
to be brighter and punchier. So, get
the Adjustment Brush from up in the
toolbar (it's shown circled here in red) or
just press the letter
K
on your keyboard.
However, I recommend that you do all the
regular edits to your photo in the Basic
panel first (exposure, contrast, etc.), just
like normal, before you grab the brush.
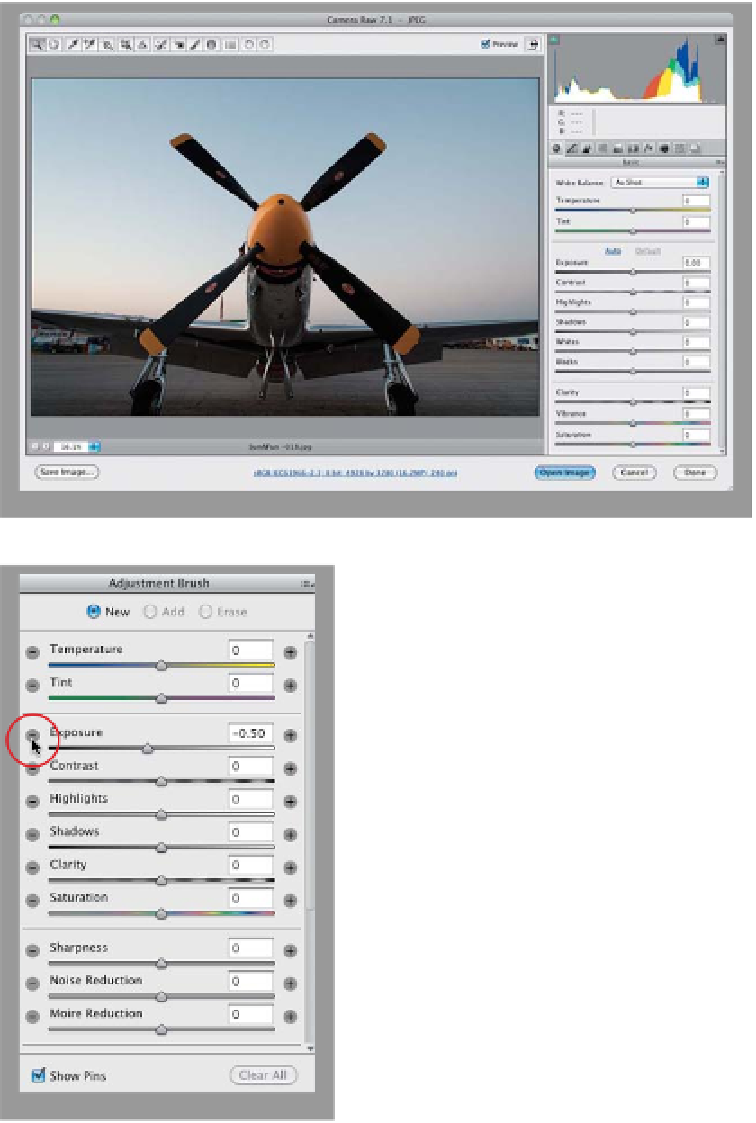
Step Two:
Once you click on the brush, an Adjust-
ment Brush panel appears on the right
side of the window, with most of the same
sliders you have in the Basic panel (except
for Vibrance), along with some extra ones
(like Sharpness, Noise Reduction, and
Moire Reduction). Let's start by darkening
the sky. With the Adjustment Brush, you
(1) choose what kind of adjustment you
want first, then (2) you start painting, and
then (3) you tweak the amount of your ad-
justment after the fact. So, start by clicking
on the - (minus sign) button to the left of
the Exposure slider, which resets all the
sliders to 0 and lowers the Exposure (the
midtones control) to -0.50, which is a
decent starting place.