Graphics Programs Reference
In-Depth Information
As much as I love the new improved Shadows slider in Camera Raw—it does a
better-quality job of opening up shadows—it's not as powerful (meaning, the old
Fill Light slider would let you go a little “over-the-top”). I particularly liked the Fill
Light slider's look for certain things like opening up shadow areas in hair, or creating
faux-HDR effects. Here's a little workaround I came up with that lets you blend the
new sliders with the old Fill Light slider, thanks to a little smart object trick.
Step One:
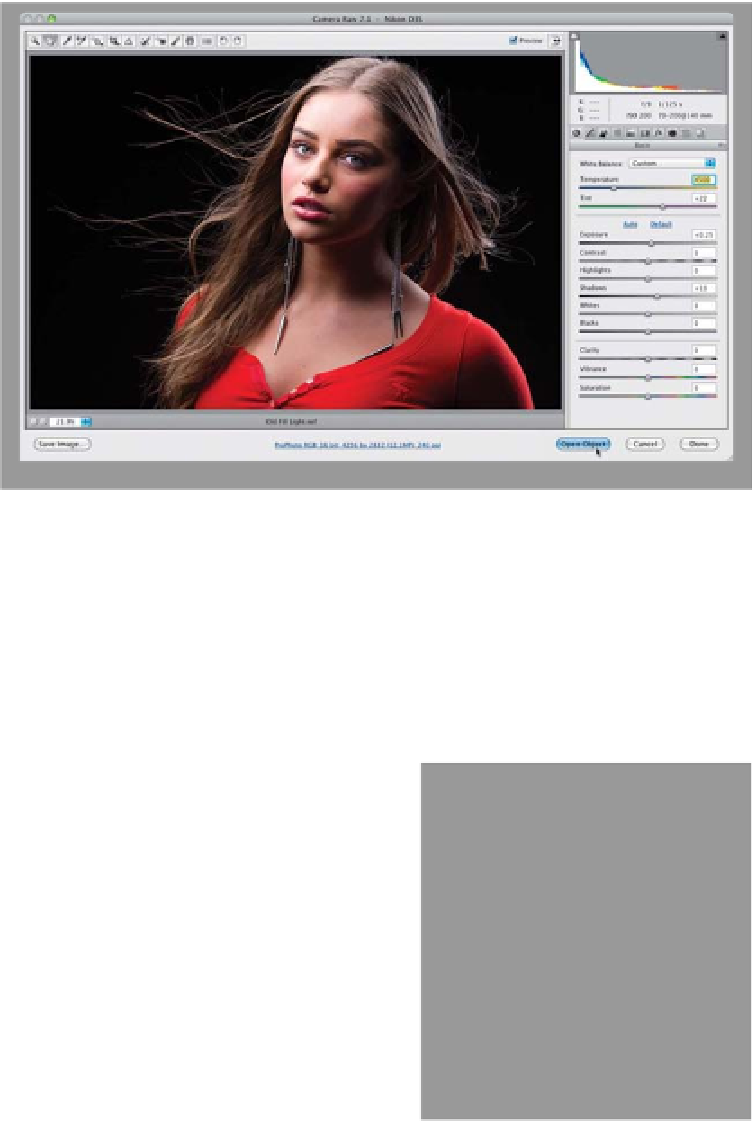
Start by opening your image in Camera
Raw and doing your standard edits (in
this case, I tweaked the white balance a
little by dragging the Temperature slider
a little bit to the right to make it warmer.
I also increased the Exposure a little—
to +0.25—to make it a bit brighter, and
I opened up the Shadows a little bit, too,
by dragging it over to +13, as seen here).
Nothing drastic, but I did do a few little
tweaks here. Now, press-and-hold the
Shift key and you'll see that the Open
Image button changes to the Open
Object button (it's shown circled here in
red). Go ahead and click it to open this
image in Photoshop as a smart object.
Step Two:
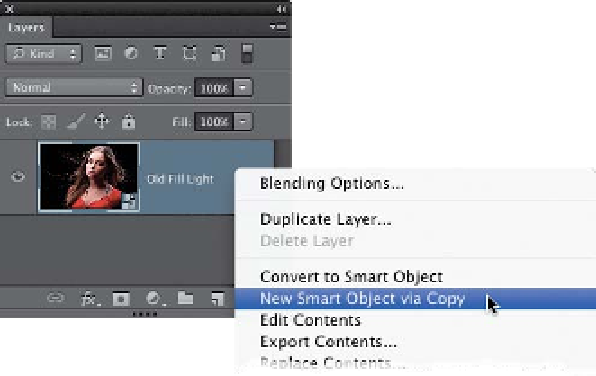
Once the image appears in Photoshop
as a smart object (you can tell it's a smart
object by looking in the Layers panel—
in the bottom-right corner of the layer's
thumbnail, you should see a little page
icon), go ahead and Right-click just to
the right of the layer's name and, when
the pop-up menu appears, choose
New
Smart Object Via Copy
(as shown here).
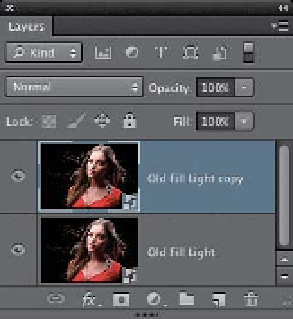
This makes a duplicate of your smart ob-
ject layer, but it is no longer tied to the
original layer, so we can edit these as
two totally independent RAW images.