Graphics Programs Reference
In-Depth Information
Some cameras seem to have their own “color signature,” and by that I mean that
every photo seems to be a little too red, or every photo is a little too green, etc.
Particular Camera
You just know, when you open a photo from that camera, that you're going
to have to deal with the slight color cast it adds. Well, if that's the case, you
can compensate for that in Camera Raw, and then set that color adjustment
as the default for that particular camera. That way, any time you open a
photo from that camera, it will automatically compensate for that color.
Step One:
To c alibrate Camera Raw so it fixes a
persistent color cast added by your cam-
era, open a typical photo taken with that
camera in Camera Raw, and then click on
the Camera Calibration icon (it looks like
a camera and is the third icon from the
right at the top of the Panel area). So, let's
say that the shadow areas in every photo
from your camera appear slightly too red.
In the Camera Calibration panel, drag
the Red Primary Saturation slider to the
left, lowering the amount of red in the en-
tire photo. If the red simply isn't the right
shade of red (maybe it's too hot and you
just want to tone it down a bit), drag the
Red Primary Hue slider until the red color
looks better to you (dragging to the right
makes the reds more orange).
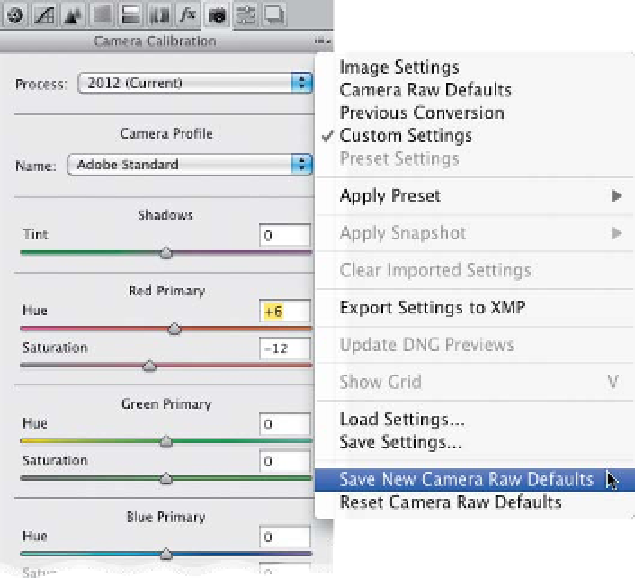
Step Two:
To have Camera Raw automatic ally
apply this calibration each time a photo
from that particular camera is opened
in Camera Raw, go to Camera Raw's fly-
out menu (in the top right of the panel),
and choose
Save New Camera Raw
Defaults
(as shown here). Now, when
you open a photo from that camera
(Camera Raw reads the EXIF data so
it knows which camera each shot comes
from), it will apply that calibration.
Note:
You can adjust your blues and greens in
the same way.