Agriculture Reference
In-Depth Information
had a nut and washer fixed at one end with a washer and wing nut at the other,
which was turned along the threaded bar to tension. The final method utilised
two lengths of threaded steel bar that were fixed at the top of the handles, but
deliberately left short of uniting at the centre. There these ends were threaded
into a metal 'turnbuckle'. To tension the blade the turnbuckle was rotated
which caused the two threaded bars to draw inwards along with the tops of the
two handles. When a blade snapped and needed replacing, then the bow saw
had to be released from tension and wound tight again once the new blade was
fixed. Overnight the bow saw was always 'slackened-off'.
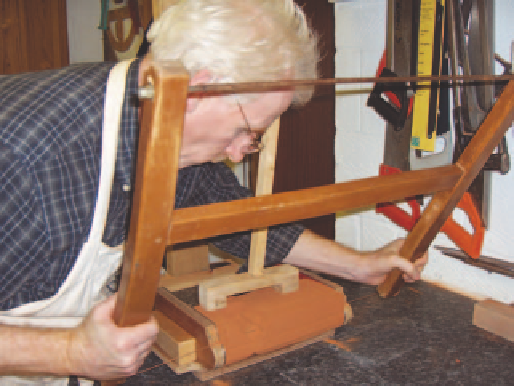
Figure 132
Author using a wire-
bladed bow saw to cut a
moulded detail.
With two bricks rubbed on bed and stretcher face square to one another and
scribed to the templet, they would then be placed with their rubbed beds to
the baseboard and scribed faces to the sides of the cutting box on the bench;
and wedged ready for cutting. A small batten called a 'bridge' would then be
rested centrally on top of the bricks to spread the pressure of a timber strut,
cut to length and pinned from the roof or ceiling of the cutting-shed onto
the bridge. Some cutters liked to work with the cutting box placed sideways
to them and use the bow saw from left to right or vice-versa (Fig. 132). Others
preferred to position the cutting box so that the cutting box faced them and
work the bow saw towards them. Whichever, it was important the cutter used
the saw so that he did not force the twisted wire blade down over the protective
metal-edged tops of the cutting boxes as this would quickly wear both. Once
the brick was cut through the top surface of the cut brick would be carefully
rubbed smooth and flat to the tops of the cutting box, with a large flat file or
length of batten; being careful to prevent 'ragging' the arrises, or edges, of the
bricks.