Graphics Programs Reference
In-Depth Information
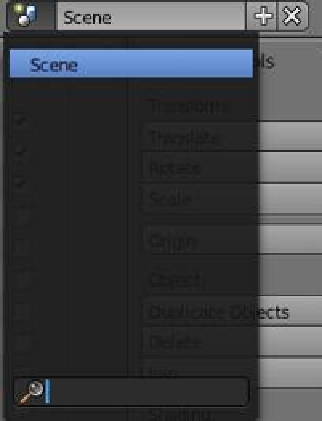
Figure B.15
Figure B.16
Click on the icon
to display a drop
down panel.
The monkey enters the scene lying on his back.
Go to the information window header at the top of the screen and click on the icon. In
the drop down panel, you can see that the Blender file contains one scene named “Scene”
(Figure B.15). Now press the + sign and select “New” to add a new scene to the file. You will
then see “Scene.001” added to the outliner window. With the cursor in the new scene 3D
window, press Shift + the A key and add a monkey object (Figure B.16). The monkey data
block is added into the outliner window and by clicking on the + sign, you can expand the
links. As with the UV sphere added to the previous scene, the monkey has no material or
texture. When you click on the “Scene” icon in the information window header, you will see
the two scenes in the file.
Figure B.17
B.2.8 Step 8
In the outliner window header, there is an “All
Scenes” drop down selection button. If you se-
lect “Current Scene” in the drop down menu,
only the data block for the scene showing in the
3D window is displayed (Figure B.17). This is
very handy when you have a complicated file
with many different scenes.