Graphics Programs Reference
In-Depth Information
15
Armatures
15.1 Adding an Armature
15.2 Single Bone Armatures
15.3 Armature Display Types
15.4 Multibone Armatures
15.5 Deforming a Mesh Object
15.6 Armature Modifiers
15.7 Humanoid Armatures
15.8 Disconnected Bones
15.9 Vertex Groups or Field of
Influence
15.10 Inverse Kinematics
15.1 Adding an Armature
In Blender, “armature” refers to an object type that is used to deform a
mesh. Think of your finger and the skin covering it and the bones inside.
The skin would be the mesh and the bones are the armature; when the bone
moves, the skin moves with it.
To begin the instruction on armatures, start with the default Blender
scene, delete the cube object, and add an armature object (press Shift + the
A Key - “Armature” - “Single Bone”). Zoom in (with the number pad + key)
and press number pad 1 then number pad 5 to get the front elevation ortho-
graphic view.
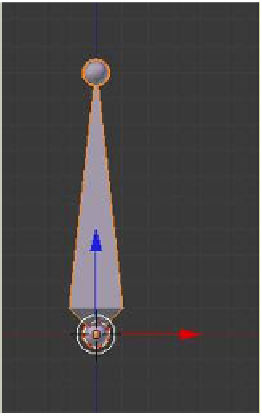
Figure 15.1
Tip
Body
15.2 Single Bone Armatures
What you see is a single bone armature (Figure 15.1). Armatures can, and
usually do, comprise multiple bones, but before we complicate anything we
should start with an understanding of bone manipulation. The default sin-
gle bone armature is displayed in type octahedral due to the object having
eight surfaces: it appears as two four-sided pyramids conjoined at the base
with spheres at the apexes. For the purpose of the demonstration, we will
name the parts of the armature tip, body, and base.
Base
Manipulation widget