Graphics Programs Reference
In-Depth Information
Figure 14.39
Curve path = 20 units
Cube object
window - “Object Data” button - “Path Animation” tab. As always, an example is the best
way to demonstrate the process.
14.8.1 Scene Setup
Start with the default Blender scene with the default cube object selected and perform the
following actions. Press number pad 7 followed by number pad 5 to place the 3D window
in top orthographic view. With the cube selected, press the S key, type 0.5, and press Enter
to scale the cube down to half its original size. Deselect the cube with the A key and press
Shift + the A key - “Add” - “Curve” - “Path.” A curve path is added to the scene, which is
four Blender grid units long. With the curve path selected press the S key + 5 and then Enter
to scale the path up to 20 units long (Figure 14.39). How you scale your object and set the
path length and shape will depend on what you are attempting to achieve in your anima-
tion. Here we are merely creating a path that will have some relevance to the values that will
be added in our demonstration.
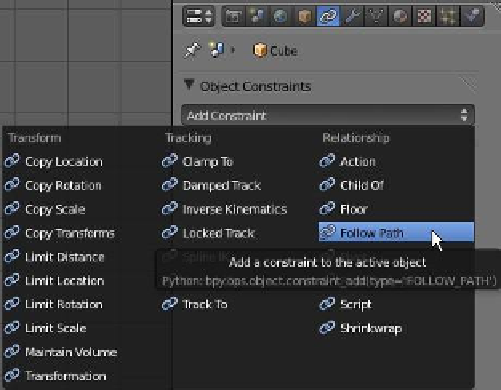
14.8.2 Add a Constraint
Deselect the curve path and select the cube object. Go to the properties window - “Object
Constraints” button - “Add Constraint” and select “Follow Path” to assign the follow path
constraint and display the constraint panel
(Figure 14.40). In the panel, click on the little
cube icon in the “Target” bar and then click on
“NurbsPath” in the drop down selection menu
that displays—this assigns the target object
(Figure 14.41). At this point, the cube moves
to the left-hand end of the path. Deselect the
cube.
In earlier versions of Blender, pressing
Alt + the A key would play an animation
showing the cube moving along the path;
however, in the latest version key frames have
to be manually inserted. Key frames are in-
serted by manipulating values in the path's
“Path Animation” tab, and then they are dis-
played in the timeline window at the bottom
Figure 14.40