Graphics Programs Reference
In-Depth Information
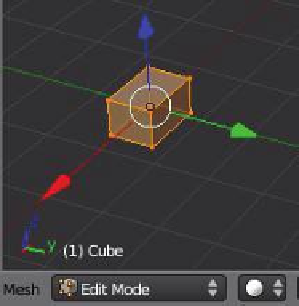
With the cube selected in the 3D window and the mouse cursor
positioned in the window, press Tab. You will see the object shown
with its edges drawn in orange with dots at each corner; these are
called vertices (Figure 1.16). Th e signifi cance of this will be discussed
in detail later. For now, toggle back to object mode.
1.6 Layers
Like many other graphics programs, Blender uses layers to aid
in constructing complex scenes. Note the display in the 3D win-
dow header; this represents 20 separate layers. Imagine sheets of
transparent drawing paper with diff erent items on each sheet be-
ing placed one on top of the other. Each square represents one
sheet. Th e orange dot in the fi rst square indicates that an object
is on the fi rst layer (Figure 1.17). Th e fact that the fi rst square is
shaded tells us that we are looking at the fi rst layer.
To move to another layer, click on one of the squares. It becomes
shaded indicating that the layer is being seen in the window. If you
click on square 2, the screen shows an empty layer. Th e
orange dot remains in square 1 indicating that there is an
object in layer 1 (it is not necessarily selected). Go back
to square 1.
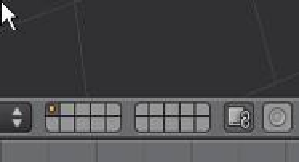
To move the cube object to layer 2, fi rst select the cube
in the 3D window. Press the M key and the “Move to
Layer” window appears. Click on square 2 and the cube
is moved to layer 2 as indicated by the orange dot dis-
played in square 2 in the window header (Figure 1.18).
Note there is still a dot in square 1. Th is shows that there
are objects on layer 1 (namely, the camera and the lamp).
Figure 1.16
Learning
Unit 2
Blender Layers
20 layers
The orange dot indicates
that an object is in the first
layer.
Figure 1.17
The orange dot will
display here when the
cube is moved to layer 2.
Click on square 2 to
move the cube to
layer 2.
The shaded
square indicates
that layer 1 is
being viewed.
The orange dot shows
that the object is on
layer 1.
Figure 1.18