Graphics Programs Reference
In-Depth Information
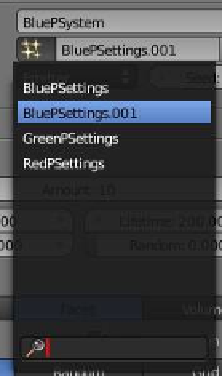
Figure 13.98
Figure 13.99
Click on “Object.”
Note:
Shift select all three planes when replaying the
animation to make the particles visible in the 3D
window. If a plane is not selected, the particles ap-
pear as tiny black dots.
Figure 13.100
I have demonstrated that you can select any data block
of settings and assign it to any particle system. Continue
by clicking on the number 2, which makes the data block a
single user. Blender does this by leaving the original as it is
and creating a new data block; however, the new data block
is identical to the original. You can see that the settings
name is now “BluePSettings.001” (Figure 13.98), but let's
change some data in this new data block. Find the “Ren-
der” tab in the “Particles” window (scroll down a bit). In
the bar containing the render type selection, click
on “Object” (Figure 13.99). In the 3D window, add
a UV sphere to the scene and give it a yellow color.
Note that Blender has named the sphere “Sphere.”
Make sure it is off to one side in the scene away from
the planes.
Reselect the green plane in the 3D window and
then go back to the “Particles” button in the prop-
erties window. Check that you still have GreenP-
System and BluePSettings.001. Now go back to the
“Render” tab for BluePSettings.001 and where it says
“Dupli Object” click on the little cube icon and then
click on “Sphere” in the drop down menu—we are
telling Blender to display and render the particles as
spheres (Figure 13.100). Scroll up to the “Physics”
tab and slightly increase the “Size” value; you will see
a sphere appear on the green plane. Play the particle
Figure 13.101
Sphere object
named “Sphere”