Graphics Programs Reference
In-Depth Information
Figure 13.82
Figure 13.83
the “Hair Length” value in the “Emis-
sion” tab to 0.290, and go down to the
“Vertexgroups” tab, click in the “Densi-
ty” box, and select “Beard.” We now have
scrawny hair on the monkey's chin. Go
to the “Children” tab and click “Simple”
for a hairy monkey (Figure 13.83). It
doesn't matter in which order you do it,
the procedure is the same: select vertices
to define the area, create a vertex group,
assign vertices to the vertex group, cre-
ate a hair particle system, and assign it to
the vertex group.
A gray monkey with a black beard
and hair in the 3D window is fine, but
it isn't all that exciting in a render—let's
jazz it up a bit. Select the monkey in ob-
ject mode in the 3D window and go to
the properties window - “Material” but-
ton. Click on “New” to add a material. Click in the diffuse
color bar and select a color for the monkey with the color
picker that displays (Figure 13.84). To start with, this color
will be applied to everything on the monkey: his skin, hair,
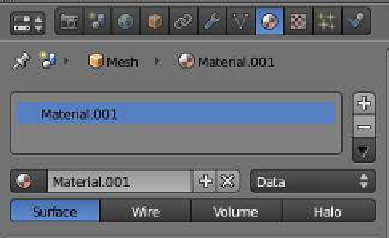
and beard. At the top of the “Material” window, note that
“Material.001” is highlighted in blue and just below that
“Material.001” is listed again. The blue highlighted “Mate-
rial.001” is a material slot and the lower “Material.001” is a
material data block. In the “Material” window's unique data
Figure 13.84
Material slot
Material data block
Click to display the
color picker.
Figure 13.85
Rename it “Skin.”