Graphics Programs Reference
In-Depth Information
Blender automatically names it “Camera.001.” Go to the properties
window - “Object” button and rename the new camera “Projector” by
clicking on the name, deleting it, retyping it, and pressing “Enter.” In
the 3D window move the projector and position it as shown in Fig-
ure 12.40. You may position the projector anywhere you like but this
demonstration will be easier to follow if you copy the example ex-
actly. To precisely position the projector, use the “Transform” panel
and enter the values as shown. This will put the projector squarely
pointing at the cube on the
x-
and
y
-axis.
Deselect the projector and change the 3D window to camera view
(number pad 0). To perform image projection, the object being pro-
jected on must have a material with some unique settings. In the 3D
window (while still in camera view), select the cube and go to the
properties window - “Material” tab. The default cube in the default
scene comes preloaded with a material, which is the dull gray color
that you see. If you have added a new cube object, you will have to add
a new material.
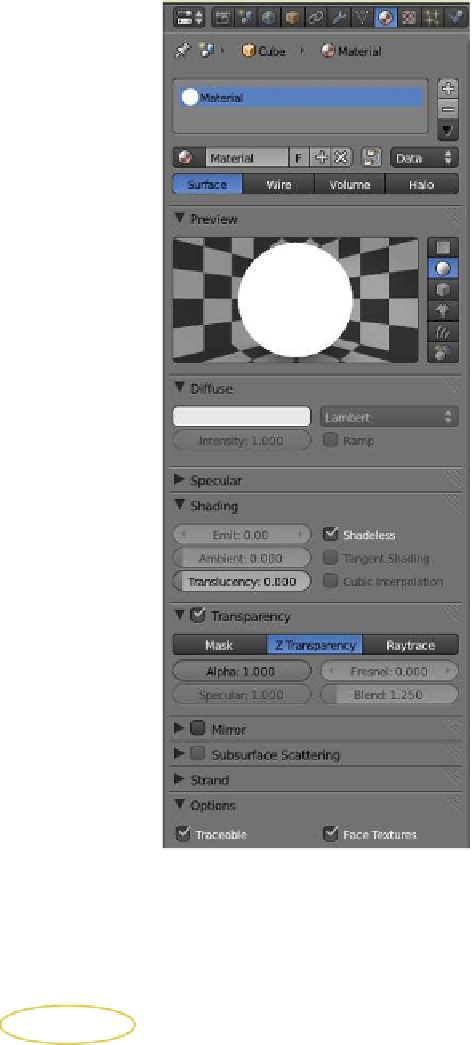
With a material added, change the following settings in the “Mate-
rial” tab as shown in Figure 12.41:
• In the “Difuse” tab, set “Intensity: 1.000.”
• In the “Shading” tab, tick “Shadeless” and set “Ambient: 0.000.”
• In the “Transparency” tab, tick “Transparency” and check
that “Alpha: 1.000” is set.
• In the “Options” tab, tick “Face Textures” and leave “Trace-
able” ticked.
We now have to tell Blender what image we want projected and give
some coordinates to project to. Split the 3D window in two and make
one half a UV/image editor window. In the 3D window with the cube
selected, change the viewpoint shading to “Textured” (Figure 12.42).
Tab to edit mode and change to face select mode (Figure 12.43). Press
the A key to deselect all the faces then right click on one face of the cube
to select just the one face. With the cursor in the 3D window, press the
U key and select “Project From View” (Figure 12.44). You will see the
face you have selected appear in the UV/image editor window.
Figure 12.41
Figure 12.42