Graphics Programs Reference
In-Depth Information
Note that the font selected is only applied to the text object selected in the 3D window.
The text is treated as an object, therefore the font style (values) you have assigned are for
the selected object only. Entering a second text object will require that you assign a different
set of data.
In the “Fonts” tab, the underline position and thickness values only operate when “Un-
derline” is ticked under “Character.” Underlining occurs as you type your text in edit mode.
10.4 Creating Text on a Curve
Text in Blender can be made to follow the shape of a curved path. Begin by adding text to
your scene as previously described; when it is in object mode, deselect it with the A key.
Add a curved path to the scene by pressing Shift + the A key - “Curve” - “Path.”
Note that
by default the path is named “NurbsPath.” The curve path is added to the scene in object
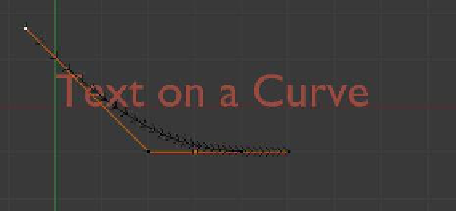
mode and appears as a straight line (Figure 10.6). You can scale it to make it longer and re-
position it in object mode, but you will have to tab to edit mode to extrude or shape it into
a curve (Figure 10.7). With the curve shaped however you'd like, tab back to object mode
and deselect it.
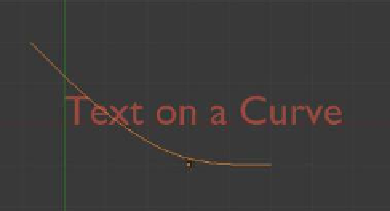
Select the text object and in the properties window - “Object Data” button - “Font” tab,
find the “Text on Curve” panel. Click on the little cube icon and in the drop down menu
that displays select “NurbsPath” (Figure 10.8). The text is shaped to follow the profile of the
curve.
Figure 10.6
Figure 10.7
Edit mode
Object mode