Graphics Programs Reference
In-Depth Information
•
Render
(Figure 8.1)
- Image. Renders an image
the same as pressing F12.
- Animation. Renders a mov-
ie or simple fi les of your an-
imation; this can take con-
siderable time depending
on the animation size.
•
Displ ay.
Drop down menu
for render display options
(Figure 8.1).
•
Dimensions
(Figure 8.1)
- Render presets drop down
menu. Preset rendering
sizes for diff erent output
formats.
- Resolution. Manual input
of
x
and
y
values for ren-
dering size instead of using
presets.
- Aspect ratio. Slider for set-
ting the size of the render display in the 3D window.
- Frame range. Set the start and end frame for each rendering and the num-
ber of steps.
- Frame rate. Animation playback rate (25 FPS for PAL output, 30 FPS for
NTSC output).
•
Antialiasing.
Output quality settings; they are normally set at 8 to give a nice
output without loss of render time (Figure 8.1).
•
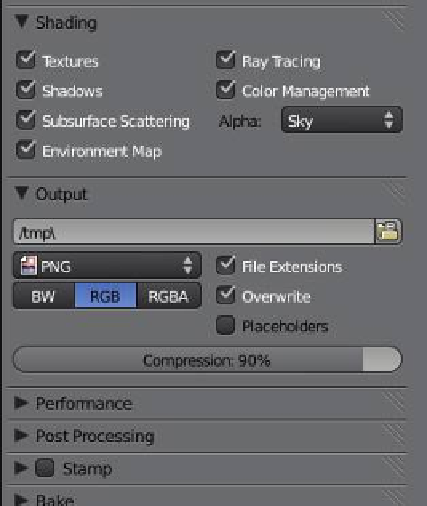
Shading.
Settings that can be turned off to exclude features from the render;
the “Alpha Sky” drop down menu gives options for the render background
(Figure 8.2).
•
Output.
Th e output bar allows you to set where you wish your render to be
saved (the default location is the “tmp” folder); the fi le type drop down menu
provides options for the type of fi le to be rendered and the default fi le type is
PNG (Figure 8.2).
Learning
Unit 5
Rendering to an
Image File
Learning
Unit 7
Render Slots
Figure 8.2
8.2 Rendering a JPEG Image
To render a simple JPEG image, set all the options previously discussed. In fact, the default
settings will do just fi ne except for the output fi le type in the “Output” tab of the properties
window—change the default PNG to JPEG. With your scene created in the 3D window,
press F12 or the “Render Image” button. With the default settings, the render window will
display. Press F3 to open the save window, type in a fi le name for the image, and press Enter
then “Save As Blender File” (Figure 8.3). In the save window you can navigate to a diff erent
folder for saving other than the one in the “Output” tab of the properties window.