HTML and CSS Reference
In-Depth Information
7.
To determine the appropriate squares, the first rule is that checkers are only on the
black (or red in this case) squares. So the code uses the same
(x
+
y) % 2 !=
0
logic that was used to compute the
css
variable. Then, checkers are only placed on
the top 3 and bottom 3 rows, so the code excludes rows 3 and 4. If the row is less
than 3, this will add a white checker and use a black checker for the other rows. The
code computes the
id
for the
img
element by prefixing the
id
of the square with
either “w” or “b”. notice that the
draggable
attribute is set to true.
8.
The
class
attribute for the
img
elements was set to piece. now add the following
rule to the existing
style
element, which will add padding so the checker will be
centered in the square.
.piece
{
margin-left: 4px;
margin-top: 4px;
}
9.
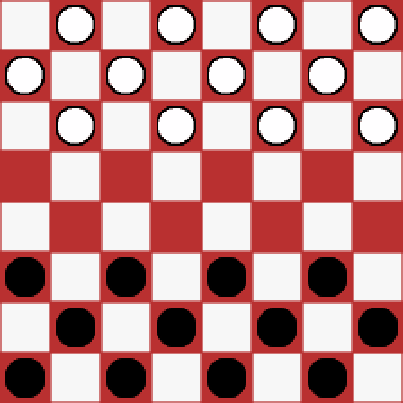
Press F5 to start the application and you should now see the checkers as
demonstrated in Figure
14-4
.
Figure 14-4.
The initial checker board with checkers
Adding Drag and Drop Support
The
img
elements were added with the
draggable
attribute so you should be able to select one and drag it.
However, you'll notice that none of the squares will accept the drop and the cursor shows the “not allowed” icon.
If you want to try some default browser functionality, try dragging an image to address bar; the browser will
navigate to the image's URL. You will now add code that will enable a drop so you can start moving the pieces.
Then you'll refine this code to ensure that only legal moves are allowed.