HTML and CSS Reference
In-Depth Information
The attributes are different from the gradients you used in Chapter
4
but accomplish basically the same
thing. The
x1
,
y1
,
x2
, and
y2
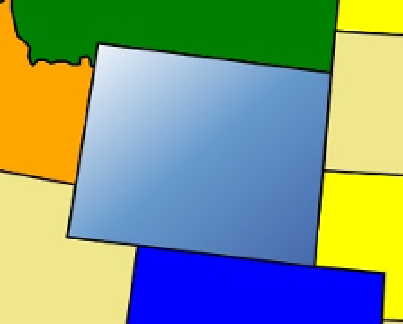
attributes define a vector that specifies the direction of the gradient. In this case, it
will start from the top-left corner and go to the bottom-right corner. This specifies three color values that define
the gradient color at the beginning, end, and midpoint.
Now add the following
path
rule at the end of the style element. This will use the new gradient for the state of
Wyoming.
path[id="WY"]
{
fill: url(#blueGradient);
}
Press F5 to start the application and then go to the map page. You should see a gradient fill for Wyoming as
shown in Figure
9-15
.
Figure 9-15.
Using a gradient fill
Using a Background Image
You can also use an image file for the shape background. You will need to first define this as a
pattern
in the
defs
element and then reference it just like you did with the gradient. For this exercise you'll use an image of the state
flag of Texas and make this the background for that state.
eXerCISe 9-7. USING a BaCKGrOUND IMaGe
1.
In the source code download for Chapter
9
there is a TX_Flag.jpg file; copy this to
the Chapter
9
\Images folder.
2.
In the Solution Explorer, right-click the Images folder and select the Add ➤ Existing
Item links. Select the
TX_Flag.jpg
file from the Images folder and click the Add
button.
3.
Add the following code to the
defs
element to define the background image. This
specifies that the pattern should use the
TX_Flag.jpg
image file and stretch it to
377 x 226 pixels. This will make it large enough to cover the path element without
needing to repeat.