Graphics Reference
In-Depth Information
Adding Captions to a Video
A simple but useful method of adding captions or subtitles to a video is to use Blender's 3D text and the flexib-
ility of the 3D window to place the text and to composite it over the video in the VSE. To add a caption to the
video file
end_zone_clip.avi
on the website in this way, follow these steps:
1.
Download the video file to your hard drive. This particular clip is encoded at a frame rate of 24 fps,
so be sure to set your frame rate to 24 fps in the Format panel of the Render buttons area before adding
the video. Add the video to the VSE editing area by pressing Shift+A and selecting Movie and then nav-
igating to the location of the movie on your hard drive and clicking Select Movie. Put the current frame
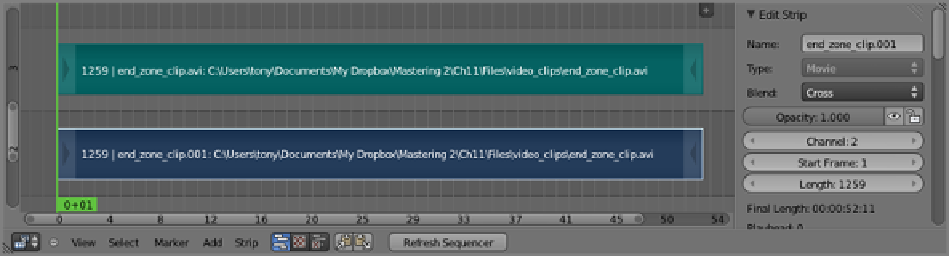
at frame 1 and press Shift+S to snap the strips to the first frame, as shown in
Figure 11-29
. Find the first
spoken line of the film, where the Death character says “Check.” This will be the line you will caption.
Figure 11-29
Adding a Movie strip
2.
Turn now to Blender's 3D viewport. Delete the default cube by pressing the X key, and press 0 on
the number pad to enter Camera view. From the Scene drop-down menu in the header, select Add New.
Choose Full Copy, as shown in
Figure 11-30
.
Name the new scene
Check
to remind you of the caption.
3.
Be sure that you have Add New Objects: Aligned To View selected as your preference in the Editing
area of the User Preferences window. This will ensure that added objects are correctly oriented toward
the camera. Press Shift+A and choose Add > Text to add a Text object, as shown in
Figure 11-31
. Enter
Edit mode if you are not already in it, and edit the text to say
Check
, as shown in
Figure 11-32
.