Graphics Reference
In-Depth Information
UV Mapping
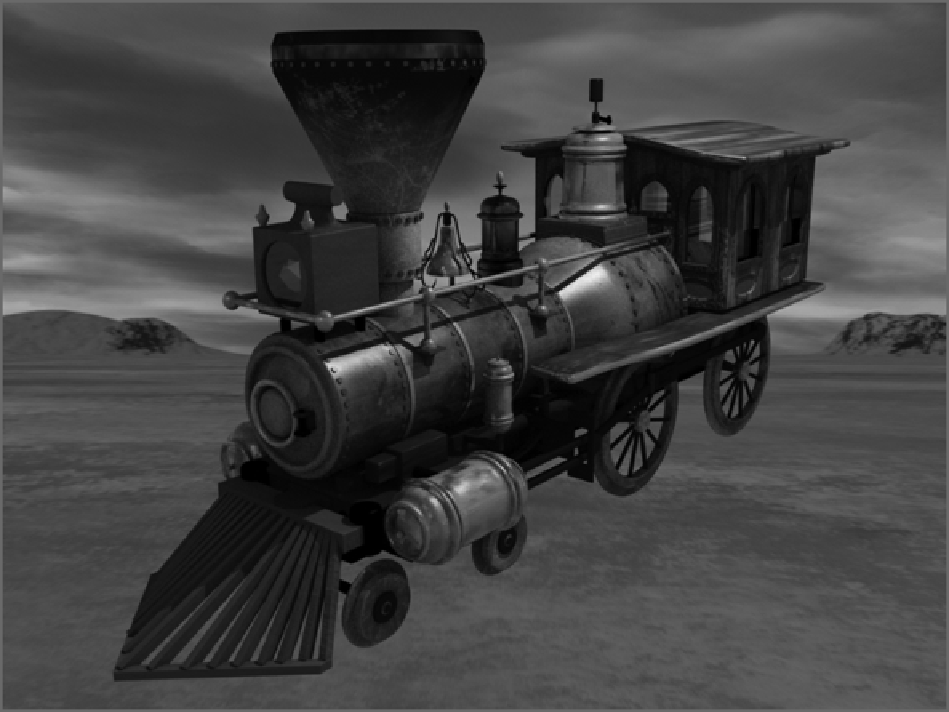
For the kind of texturing you see in
Figure 2-2
(a color version of this image is included in the topic's color
insert), it is necessary to have complete control over where every texture is applied to every part of the mesh.
For this, a special kind of texture mapping exists, called UV mapping.
Figure 2-2
A UV-textured model (background skymap by M@dcow from BlenderArtists.org)
UV mapping derives its name from the 2D coordinate system describing the surface of the mesh. In tradi-
tional 2D environments, coordinates are described in terms of X and Y. However, in a 3D environment, X, Y,
and Z are used to describe the 3D space. Another set of coordinates is required to describe the surface of the
mesh,sothelettersUandVareused.Logically,thethirddimensioninthiscoordinatesystem,W,wouldextend
along the vertex normals of the mesh; however, this coordinate name is not used in Blender.
The idea behind UV mapping is to create the mapping between the 2D UV surface of the mesh and the 2D
imagebyhand,albeitwithanumberofpowerfultoolsatyourdisposal.Indeed,Blender'sUV-mappingtoolsare
among the best in the industry. The process at its simplest involves three steps: unwrapping the mesh, creating
thetexture,andapplyingthetexturetothemesh.Theunwrappingstepisthekeytothemapping,anditrequires
thatthemeshbecorrectlypreparedinadvancewithseamstoindicatewherecutswillbemadeinordertoflatten
the surface with minimal distortion. The process of creating the texture is typically done outside Blender, in a