Geography Reference
In-Depth Information
Again for Figure 36, I've already filled in my details, but you should easily be able to see that
GeoKettle supports a wide variety of database types.
Under
Connection Type
, select
PostgreSQL
.
Under
Access
, select
Native JDBC
and fill
in the appropriate details to connect to the same database you connected to when adding
the point data using QGIS.
Once you're done, give the connection a name and click the
Test
button. You should be
shown a small dialog stating that the connection to the database is OK, as shown in the
previous figure. Click
OK
to close the dialog, and click
OK
in the
Database Connection
window to go back to the
Table Output
options.
Next, you must set a target table name so the transformation step knows where to insert the
data. You may also want to select the
Truncate table
check box to ensure the table is void
of data before starting. The other table output settings can usually be left as they are.
If you're creating the data for the first time, you'll need to click the
SQL
button at the bottom
of the window to automatically generate and run the SQL necessary to create the initial table
in your database. If you're using an existing table, this will give you the SQL needed to
ensure the table schema matches the data. It's fairly straightforward, and if you have any
knowledge of SQL you'll see immediately what's happening.
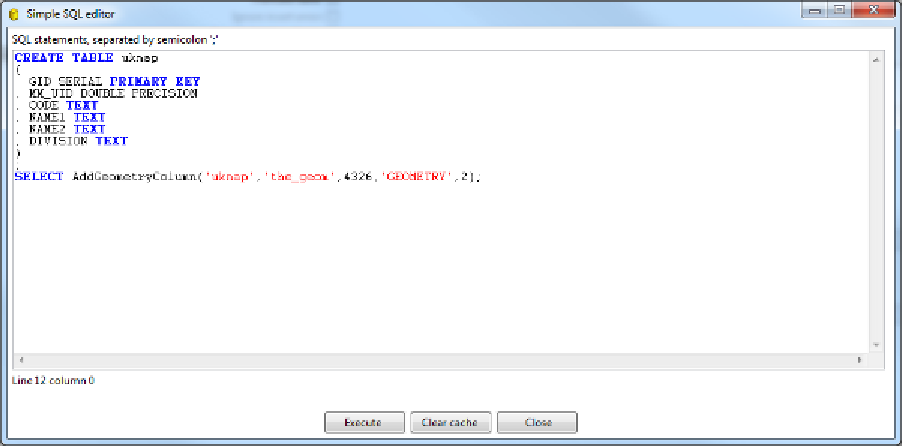
One thing I often do in the SQL dialog is add a primary key because GeoKettle does not
automatically add one. There are transformation steps for adding primary keys and such, but
I find it easier to add the extra field in the SQL editor when creating the table by manually
typing in the extra line. In the following figure, you can see I added a primary key with the
definition for GID in Postgres.
Figure 37: Adding a Primary Key
When you're done editing your SQL, click
Execute
to run it. Once you've run your SQL
successfully, you can click
Close
to exit the SQL editor and then click
OK
to navigate back
to the transformation workspace. You've completed setting up the required steps.