Graphics Programs Reference
In-Depth Information
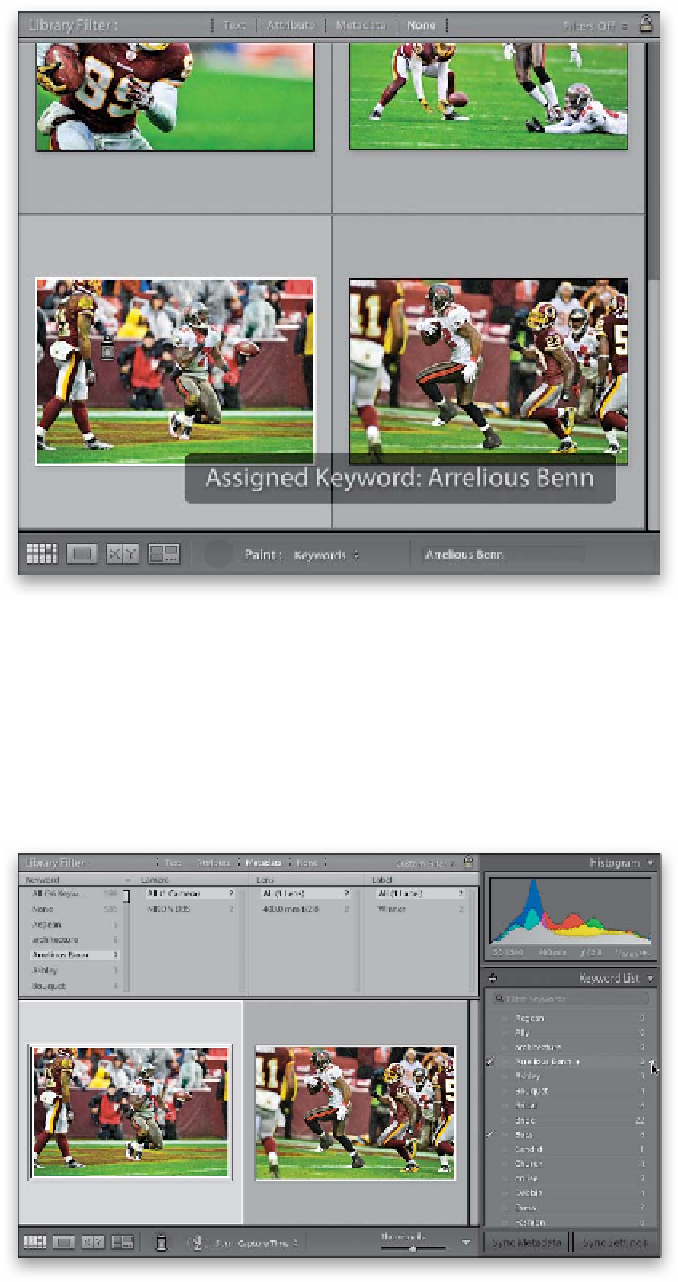
Step Five:
Scroll through your images and any time
you see an Arrelious Benn photo, just click
once on it and it “paints” that keyword
onto your photo (you can add as many as
you want—just remember to put a comma
between them). As you click the Painter
tool, a white highlight border will appear
around the tagged photo, and a dark rec-
tangular box appears with the keywords
you've just assigned (as seen here). If you
see multiple photos in a row you want to
tag, just press-and-hold your mouse but-
ton and paint right across them, and they'll
all be tagged. When you're done with the
Painter tool, just click back where you
found it in the toolbar. The Painter tool
is what I use when I have a lot of photos
in a shoot, but just need to tag some indi-
vidual photos with a particular keyword.
TIP: Create Keyword Sets
If you use the same keywords often, you
can save them as a Keyword Set, so they're
just one click away. To create a set, just
type the keywords in the Keyword Tags
text field, then click on the Keyword Set
pop-up menu at the bottom of the panel.
Choose
Save Current Settings as New
Preset
and they're added to the list, along
with built-in sets like Wedding, Portrait, etc.
Step Six:
The next panel down, Keyword List, lists
all the keywords you've created or that
were already embedded into the photos
you've imported. The number to the right
of each keyword tells you how many pho-
tos are tagged with that keyword. If you
hover your cursor over a keyword in the
list, a white arrow appears on the far right.
Click on it and it displays just the photos
with that keyword (in the example shown
here, I clicked on the arrow for Arrelious
Benn, and it brought up the only two
photos in my entire catalog tagged with
that keyword). This is why specific
keywords are so powerful.