Graphics Programs Reference
In-Depth Information
Lightroom Killer Tips
>
>
▼
Hard Drive Space an Issue?
Convert to DNG on Import
▼
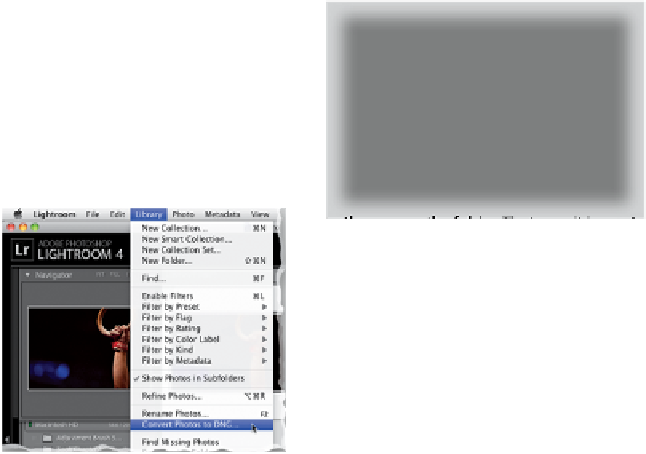
Converting Photos to DNG
If you didn't choose Copy as DNG at
the top center of the Import window,
and you want your imported photos
saved in this file format, you can always
convert any photo you've imported into
Lightroom into a DNG by just clicking
on the photo(s), going to Lightroom's
Library menu, and choosing
Convert
Photo to DNG
(although, technically,
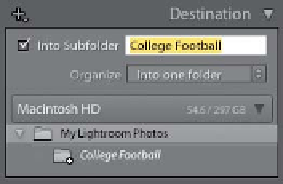
separate folder. So, if you choose the Into
One Folder option, I recommend that you
turn on the Into Subfolder checkbox and
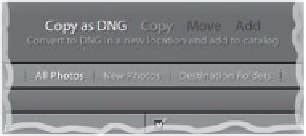
If you're working on a laptop, and you'd
like to save between 15% and 20% (in
most cases) of your hard drive space
when importing RAW files, click on
Copy as DNG at the top center of the
Import window.
then name the folder. That way, it imports
them into their own separate folder inside
your Pictures or My Lightroom Photos
folder. Otherwise, things will get very
messy, very quickly.
▼
Changing Your Grid View
Thumbnail Size
You don't have to have the toolbar at
the bottom of the center Preview area
visible to change your thumbnail size
in the Library module's Grid view—just
use the + (plus sign) and - (minus sign)
keys on your keyboard to change sizes.
The cool thing is that this works in the
Import window, too.
▼
Lightroom 4 Handles Your
Backup Better
In earlier versions of Lightroom, when
you copied images to a backup hard
drive, it didn't include any custom file
names, or metadata, or keywords that
you added—it just made an exact copy
of what was on the memory card. Now,
it renames these second copies, includes
your metadata, and keeps your file
structure, as well.
you can convert JPEGs and TIFFs into
DNG format, converting them into DNG
doesn't really offer any advantages, so
I only convert RAW photos to DNG). This
DNG replaces the RAW file you see in
Lightroom, and the RAW file remains
in the same folder on your computer
(Lightroom, though, gives you the
option of deleting the original RAW
file when you make the conversion.
This is what I choose, since the DNG
can include the RAW photo within it).
▼
Save Time Importing into
Existing Folders
▼
Choosing Keywords
Here's how I choose my keywords:
I ask myself, “If months from now, I was
trying to find these same photos, what
words would I most likely type in the
Find field?” Then I use those words.
It works better than you'd think.
▼
Organizing Images in Folders
You get to choose how your images are
organized, as they're imported, in the
Destination panel. If you don't turn on
the Into Subfolder checkbox and you
choose Into One Folder from the Orga-
nize pop-up menu, Lightroom tosses
the loose photos into your Pictures or
My Lightroom Photos folder (whichever
folder you chose in the To section at the
top right of the Import window), and
they're not organized within their own
▼
You Can Impor t and Edit PSDs
and More!
In earlier versions of Lightroom,
you could only import and edit RAW
images, TIFFs, and JPEGs, but in Light-
room 3, Adobe added the ability to
import PSDs (Photoshop's native file
format), along with images in CMYK
mode or Grayscale mode.
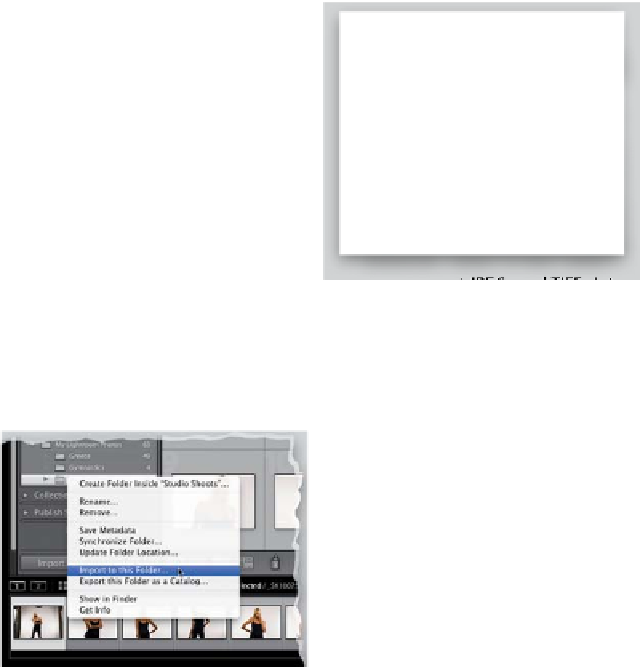
If you're going to import some photos
into a folder you've already created, just
go to the Folders panel in the Library
module, Right-click on the folder, and
choose
Import to this Folder
from the
pop-up menu. This brings up the Import
window with this folder already chosen as
the destination for your imported photos.